Create a Static Widget in the ClassicPress Dashboard

A static dashboard widget is a great way to share information, important links, or action items with your clients when you hand-off a site. Very little code – very high user impact!
When handing off a ClassicPress website to a client, do you provide them with information or links to get them off to a good start? A static widget in the dashboard – just like the one pictured below – is a great solution for this! Wouldn’t it be cool to add something like this to the client’s dashboard? Well, we’re going to build it shortly.
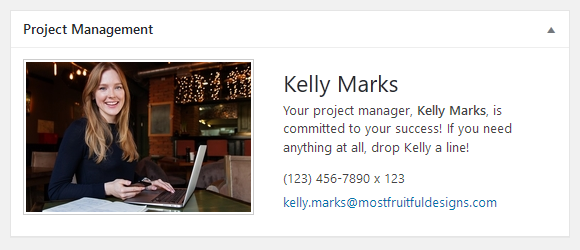
Depiction of a Static Text Widget
The image above depicts what we’ll be creating here today. However, before moving on, let’s make a few quick distinctions about widgets, shall we?
Static Widgets vs Dynamic Widgets
Whereas a dynamic widget shows content that changes over time, such as latest posts or recent comments, a static widget shows the same content always. In the image above, the widget is simply inviting the user (ie, your client) to contact their project manager.
Of course, this is just a simple example of how you might use a static widget. Indeed, you might want to include your business address, hours of operation, helpful links, payment info, or any of those other things that you might typically include in a hand-off document.
Dashboard Widgets vs Front-end Widgets
One last distinction to make before starting this project is the difference between dashboard widgets and front-end widgets. It’s simple, but, bears repeating.
Dashboard widgets will appear in the main dashboard view. The site admin can collapse and expand the widget, as well as move it to a new position, or even hide it altogether.
Front-end widgets are those that are displayed to visitors on your site. Visitors cannot usually expand or collapse front-end widgets (although there are exceptions,) but, they will not likely be able to move or hide the widget content.
Where to Place the Code?
If you’re coming from the WordPress space, you will be familiar with placing code into your theme’s functions.php file. This is the “old school, quick ‘n dirty” way, and is no longer recommended. The code in this tutorial should be placed into an utility plugin. If your site already has a utility plugin, great, you can just add the code below to that plugin. If you don’t yet have such a plugin, go build one. I’ll wait for you here.
The Process of Creating a Static Widget
To create a dashboard widget, three objectives must be achieved. The three objectives are to:
- create a function that prints the widget content, and
- create a function that registers the new widget in the system, and
- use an action hook to specify when the widget should be registered.
Let’s work through these objectives now. Move through the following steps, adding the code examples to your utility plugin. There’s no need to make customizations as you go – let’s just get it working first and fine-tune later.
1. Print the Widget Content
This simple function populates the widget with your content. As you can see, PHP tags are used in the function to allow for neater HTML markup. Add the code to your utility plugin.
function codepotent_display_static_dashboard_widget() {
    ?>

    <h1>Hey, it worked!</h1>

    <?php
}
2. Register the New Widget
This function registers the widget in the system by calling the wp_add_dashboard_widget function with several arguments. These arguments tell the system your preferred id and title for the widget, as well as the name of the function that will ultimately output the widget content (from step 1 above.) Add the code to your utility plugin.
function codepotent_register_static_dashboard_widget() {
    wp_add_dashboard_widget(
        'my_static_dashboard_widget', // your own custom widget id
        'My Widget', // the widget box title
        'codepotent_display_static_dashboard_widget' // function that displays content
        );
}
3. Hook the New Widget in at the Right Time
In case you didn’t notice, those functions created in Steps 1 & 2 aren’t actually called anywhere. Yet. If they aren’t called, they can’t run. That’s where an action hook comes into play. The action hook tells the system exactly when to run the function that registers your widget, which, in turn, tells the system which function to use to display the content. Now, that was a lot of words, but, it really just boils down to a single line of code that says “run this function during the wp_dashboard_setup action.” Add the line to your utility plugin.
add_action('wp_dashboard_setup', 'codepotent_register_static_dashboard_widget');Verify your Work
With the above objectives out of the way, take a moment to verify your work. Head over to the dashboard and find that you now have a new widget showing in all its glory. Collapse it. Expand it. Move it around. Hide it. It should work just like every other widget in the dashboard.
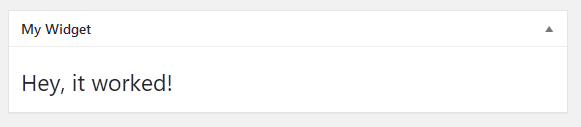
Initial Static Text Widget
Add Meaningful Content
With the widget now displaying in the dashboard, you can revisit the display function (from Step 1) and flesh it out with whatever content you like. In the final example below, I’ve combined the code from above and added some additional markup to make the widget look like the original example image.
// Step 1
function codepotent_display_static_dashboard_widget() {
    ?>
    <div style="display:grid;justify-content:space-between;grid-template-columns:repeat(auto-fit,minmax(48%,1fr));grid-template-rows:1fr;grid-gap:20px;">
        <div>
            <img src="https://codepotent.com/wp-content/uploads/2019/07/kelly-marks-avatar.jpg" style="border:1px solid #ccc;padding:2px;">
        </div>
        <div>
            <h2>Kelly Marks</h2>
            Your project manager, <strong>Kelly Marks</strong>, is committed to your success! If you need anything at all, drop Kelly a line!
            <ul>
                <li>(123) 456-7890 x 123</li>
                <li><a href="#">[email protected]</a></li>
            </ul>
        </div>
    </div>
    <?php
}

// Step 2
function codepotent_register_static_dashboard_widget() {
    wp_add_dashboard_widget(
        'my_static_dashboard_widget', // your own custom widget id
        'My Widget', // the widget box title
        'codepotent_display_static_dashboard_widget' // function that displays content
        );
}

// Step 3
add_action('wp_dashboard_setup', 'codepotent_register_static_dashboard_widget');
Extra Credit
The example above will show the widget to anyone who has access to the main dashboard. Can you think of a way to show the widget to only admin users? Or, how about limiting it to just a single user? I think you can figure it out!
Wrapping Up
Adding a static widget to the ClassicPress dashboard is actually quite easy. There’s no need to add a whole plugin just to show some information in the dashboard. With very little work, you can create your own great-looking dashboard widgets and show your clients that their site is on your mind. Add text, links, images – or anything else that might be helpful to your clients!
What do you think?
Did you realize dashboard widgets were so easy to create? Have you been using a plugin and are going to switch to this method instead? What other things might you include in a dashboard widget? I’d love to hear your thoughts – let me know in the comments!
This tutorial has been provided by John Alarcon and was originally published on CodePotent.com. The original post can be found here.