How To Setup ClassicPress on Ubuntu 16.04 Using VestaCP at Digital Ocean
Setting up ClassicPress on Ubuntu 16.04 using Vesta Control Panel
In this guide, you will learn how to set up, install and configure ClassicPress on an unmanaged web server at Digital Ocean VPS.
The server we are going to set up should be running on Ubuntu 16.04 with a working Vesta Control Panel that can be used to manage multiple websites, email accounts, Ftp accounts, Mysql Databases, DNS records and more.
Requirements:
- Your time.
- A cup of water.
Let’s go steadily and consistently.
To start with, let’s discuss…
An Unmanaged Server
As the name explains, an unmanaged server is one that is not automatically controlled or managed by a hosting provider or other service; it is managed by you. The hosting provider gives you access to a dedicated server where you install the necessary components to keep your server & website running. There is no support mechanism to could guide you if anything goes wrong.
So, you can either hire skilled people to help you with the configuration or you can do it yourself with a manual installation guide. (Be aware that you can mess things up if you aren’t skilled enough.)
For a moment, let’s assume you have a knowledge of how to set up a server and you got your website running successfully. Fortunately for you, in time your business/website starts to gain traction and your business starts to grow. But, over time, you notice your website has become a resource hog. Your dedicated unmanaged server isn’t capable of serving your website anymore.
All is not lost! You have three options:
- Add more resources to the existing server. This may or may not be possible, depending on your hosting provider. Some hosting providers allow for an upgrade, while others do not. If you are lucky and your provider supports an upgrade, then you can add more resources. However, there are usually limits to how much you can add and, depending on how it is set up, you may experience some downtime during the transition.
- Add more servers and distribute them accordingly. This can be a daunting task, as you have to manually configure them yourself or hire knowledgeable people to do it for you.
- Migrate to a cloud server. A cloud server is capable of scaling automatically as the need arises. You can automatically upgrade CPU, Ram, or Disk Space with little to no downtime.
This guide will assist you in registering and configuring your cloud server at DigitalOcean.
What is a DigitalOcean VPS?
DigitalOcean is a cloud hosting provider that offers, among others, Virtual Private Servers (called Droplets). Like a dedicated server, you own your Droplet. You have the privilege of choosing your OS during deployment and you’ll also be able to configure the VPS to your liking.
The benefits of using Digital Ocean’s VPS solution are that they maintain the hardware for you, and you can automatically scale when the need arises.
If you feel like learning more about DigitalOcean, I created an article on that: What is Digital Ocean and What Are Droplets Used For [Simple Guide!]
With that understanding, we are ready to move into the main meat of this guide. (Who doesn’t love meat anyway? 😉 )
Note: I’ll assume you have a registered domain name
Let’s buy a server at DigitalOcean and get on to setting up ClassicPress.
Registering at DigitalOcean
If you have a registered domain, then you want to point the domain name to your Droplet. (You’ll remember I said a Droplet is Digital Ocean’s name for a Virtual Private Server). You need to purchase a Droplet to proceed.
Hey: Get $100 free credit for 60-days when you use ClassicPress referral link, this way, you not only enjoy free credit but you also help in supporting ClassicPress infrastructure.
This is a no-referral link, if you prefer: Register with DigitalOcean
Step by Step Instruction:
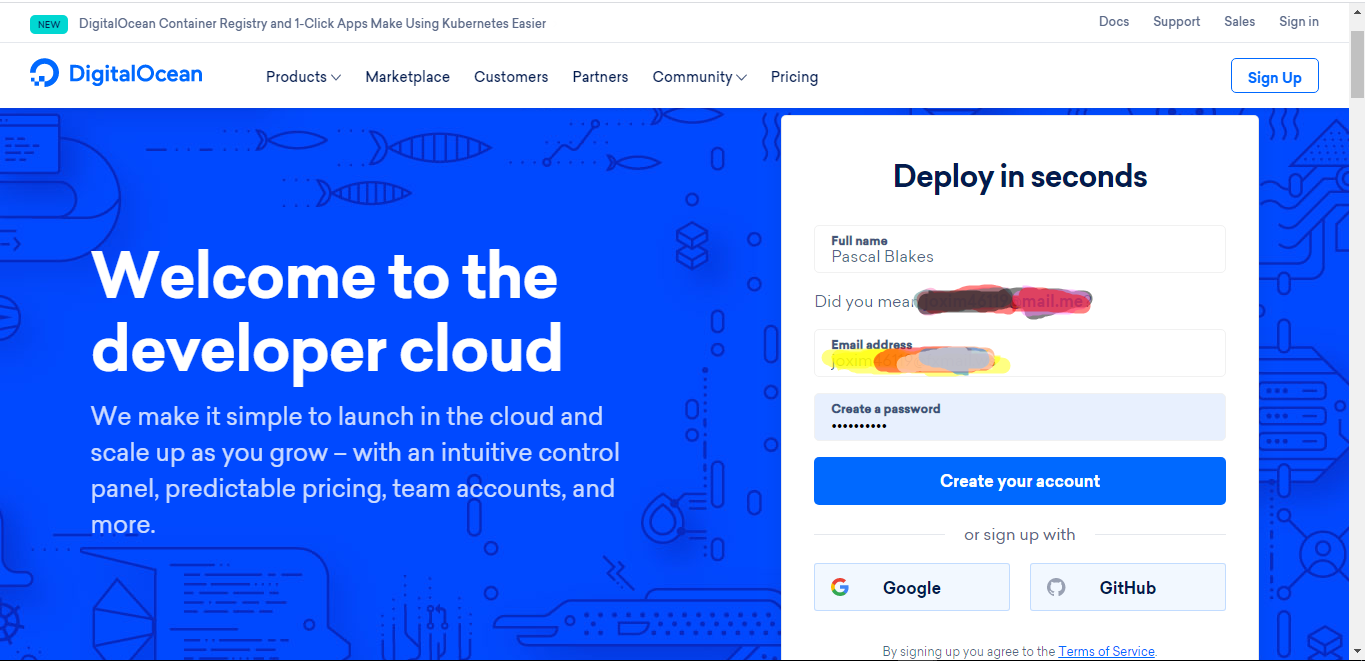
- Click on the ClassicPress referral link above, and fill in your details as shown below:

I obfuscated some fields for personal reasons 😉 - Sometimes, you might be redirected to a Recaptcha page upon clicking the “Create Your Account” button. Verify you are not a robot and you will be redirected to the below image. Click “Create Account”
You will only see the green box saying you’ve received free $100 when you use ClassicPress referral code - You will be sent a confirmation link to confirm your email address.
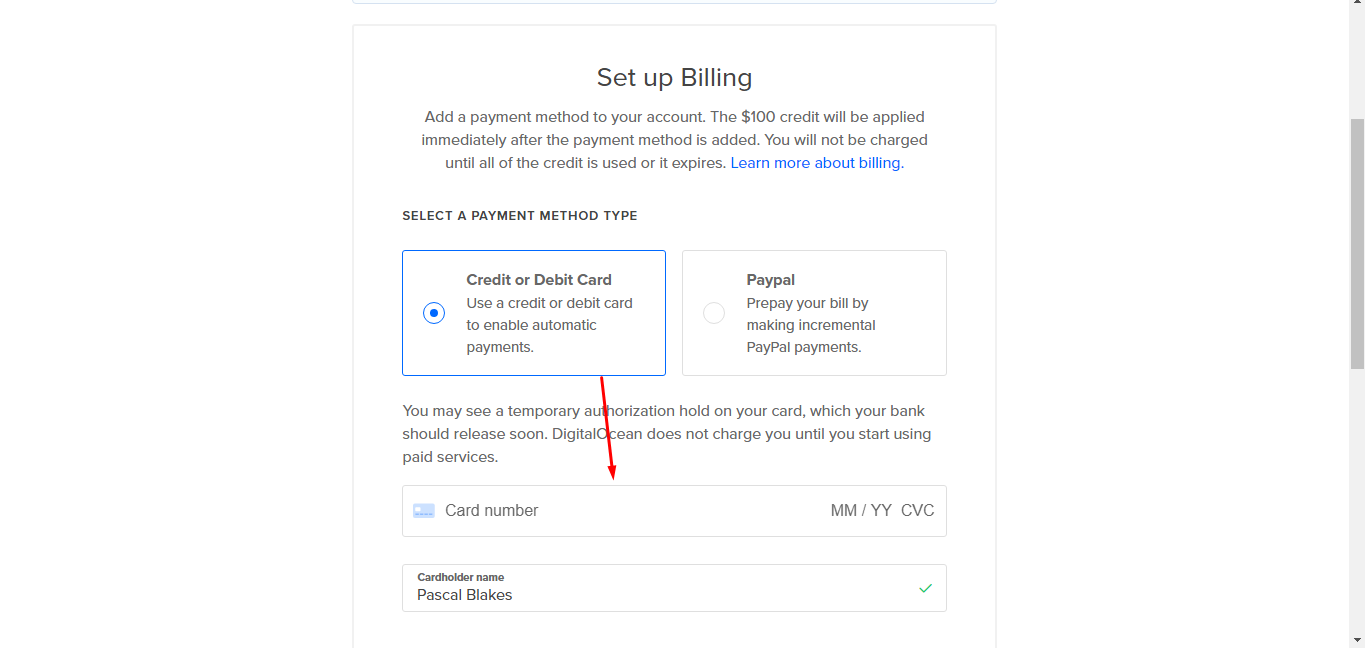
- Once you’ve verified your email address, you will need to set up your billing account. This is necessary in order to eliminate frauds and spammers. Fill in your credit card details or use PayPal to make the process faster.
You may see a temporary authorization hold on your card, which your bank should release soon. DigitalOcean does not charge you until you start using paid services. - Don’t be surprised if your account is automatically locked after verifying your payment details. Don’t be scared; you will be unlocked after the team checks it manually, This could take a few hours, so if you don’t want to wait, contact them using this email address: [email protected].
Tips: In case you are asked the reason for choosing DigitalOcean, reply by saying: I want a better cloud hosting with a greater uptime for my website.

Hopefully, your account is now unlocked, and you are ready for the next step. We’ve covered a lot already, this is where the information you learn above should merge together like ice-blocks 😉
Creating a Droplet on DigitalOcean/Creating an SSH
Droplet is the nickname of Digital Ocean’s VPS (Virtual Private Server). They are virtual machines that run on top of a virtualized hardware. They mimic a real server in that you are provided with a set amount of CPU, SSD (Solid State Disk) Storage, and RAM.
Let’s create our first Droplet:
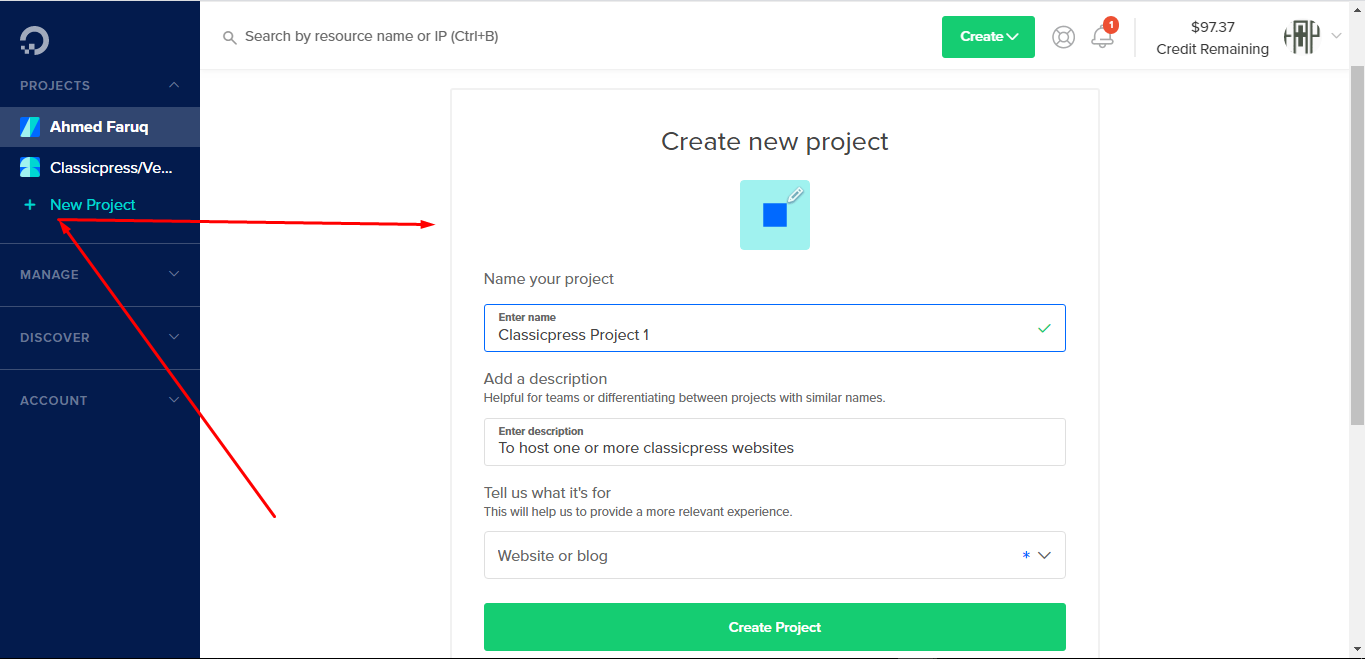
- Click on your new project and fill the fields: Name of your project, description, and purpose.
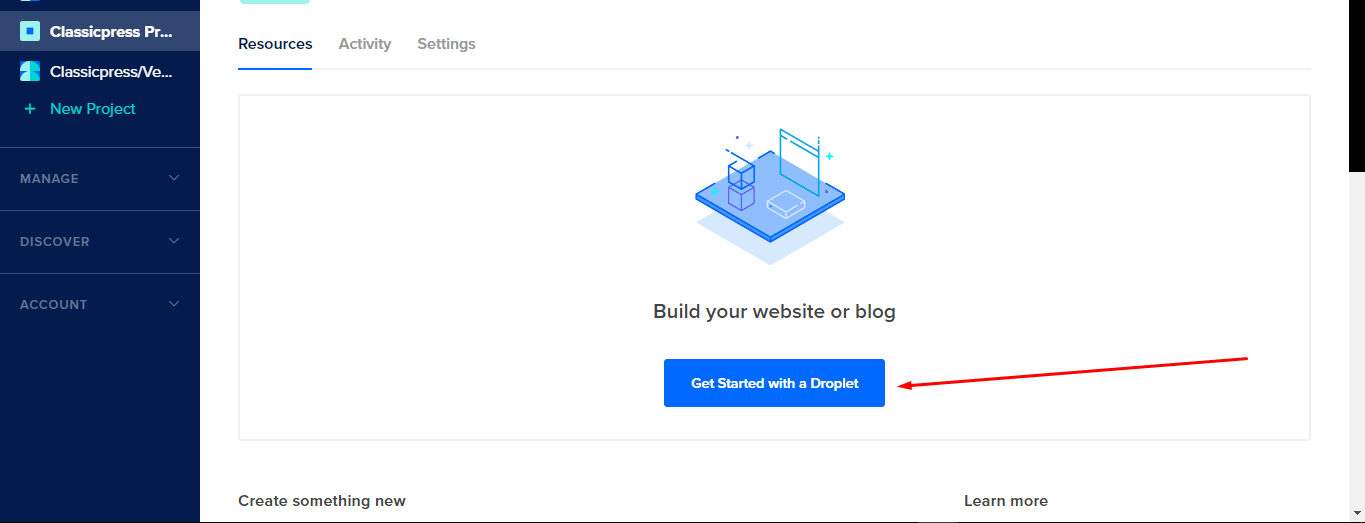
- Click on “Get Started With a Droplet”
- Select Ubuntu 16.04.6 x64
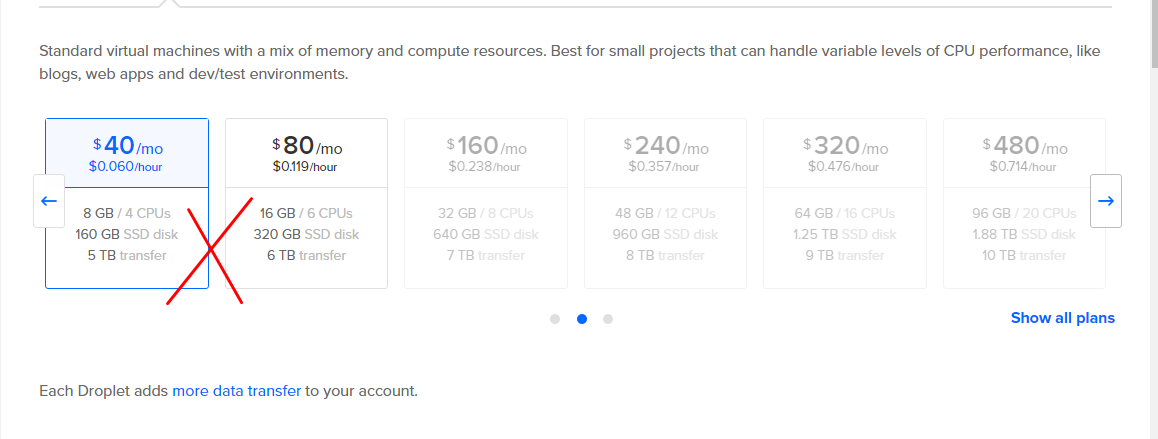
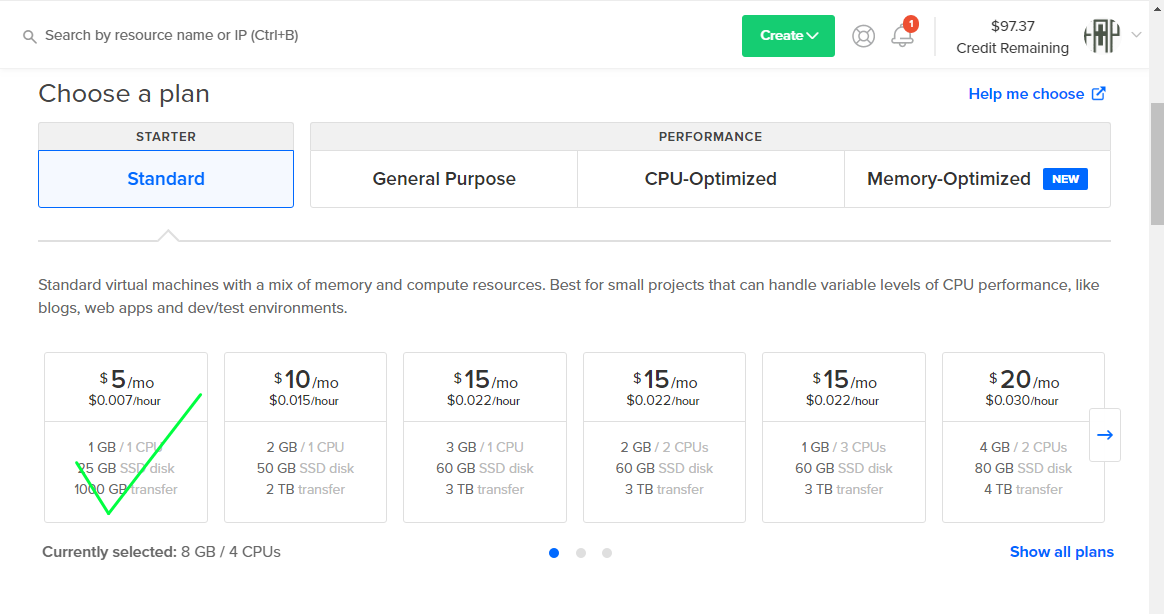
- Wait! Don’t select the $40 Droplet, you don’t need it if you are just starting out. The $5 Droplet can handle more than you think it can. Select the $40 Droplet if you know what you are doing. If you use the ClassicPress referral link, the $40 Droplet covers you for two months, which is $80, then you pay $40 every following month.
For me, the $5 Droplet is okay for now.
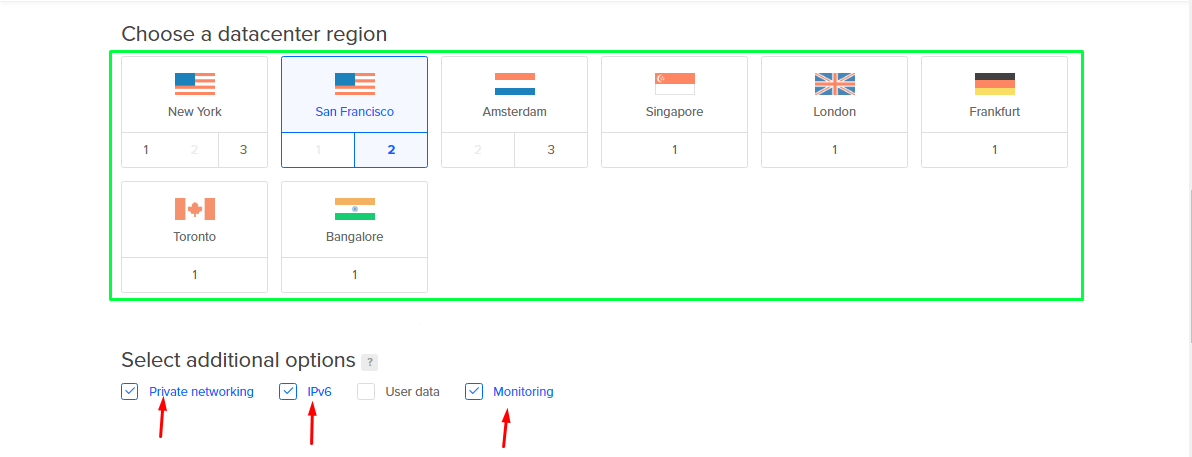
. $10 Droplet isn’t bad either if you feel 5 bucks is too cheap 😉 - Select your datacenter region (where you want your data hosted, e.g if your users are based in New York, select it, if you don’t have an idea, kindly ignore and select at random).
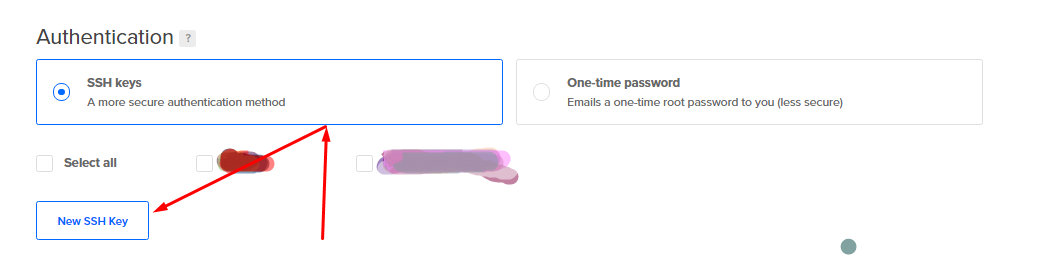
Please tick those boxes the red arrow is pointing to - Please Select SSH as your authentication. Secure Shell is more secure than using a password to login on your server. SSH helps to communicate remotely with another computer in a secure way by ensuring that the exchange of data is encrypted. Encrypting the data keeps it from being intercepted by an unauthorized system. There is more to this, but for now, just see SSH as being stronger when compared to Password authentication.
Let’s proceed.
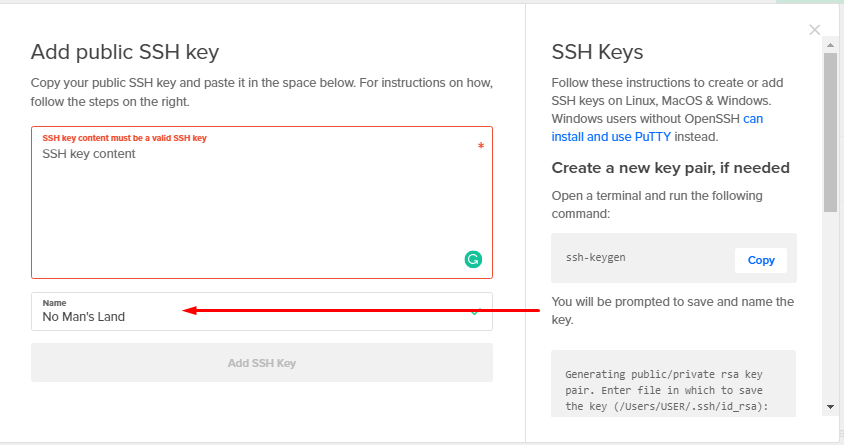
Select SSH and Click on NEW SSH KEY Enter Your SSH Name Here
In completing these steps, some stuff could get complicated along the way. Let me briefly explain the concept of how SSH works:
Do you remember when I said “SSH helps to communicate remotely with another computer”?
There are two pairs of SSH keys: Private and Public. The private is known as the client key (those are the ones in your physical or local computer); the public key is stored in your server (in this case, your Droplet).
When the client tries to connect to the server, the client does this to the server:
- Client: “Hey server, I am your boss, I have the private keys.”
- Server: “Hmm, where is your signature if you are my boss?”
- Client: “……….” (note: the client isn’t actually sending the private keys. It demonstrates to the server that he is the owner of the private key, in the form of a digital signature)
- Server: “Let me verify from my Public key.”
The server verifies the signature and if it correlates, the client is given access to the server.
We need a way to generate the Private and Public Keys. On windows we use a program called PuTTY, on Mac and Linux, you use Openssh.
I am on Windows, so, I will be using PuTTy. Mac and Linux users can follow the on-screen instructions here:
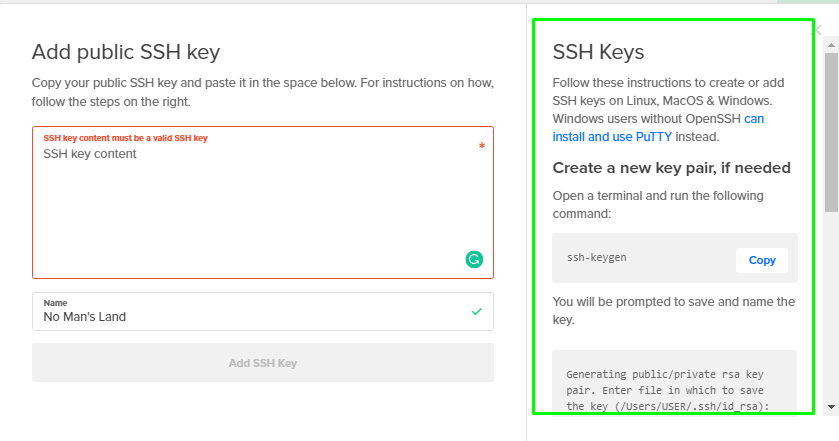
Steps for windows are as follows:
Go to the PuTTy website, and download the setup appropriate to your system:

Install PuTTy on your local computer by double-clicking the putty program file,

Upon clicking on Next in the above image, click on the subsequent Next and wait for PuTTY to complete the installation.
Once that is done, search for PuTTYgen or locate it inside this folder: C:\Program Files\PuTTYand open puttygen.exe
To go to this folder on a 32-bit system: C:\Program Files (x86)\PuTTY
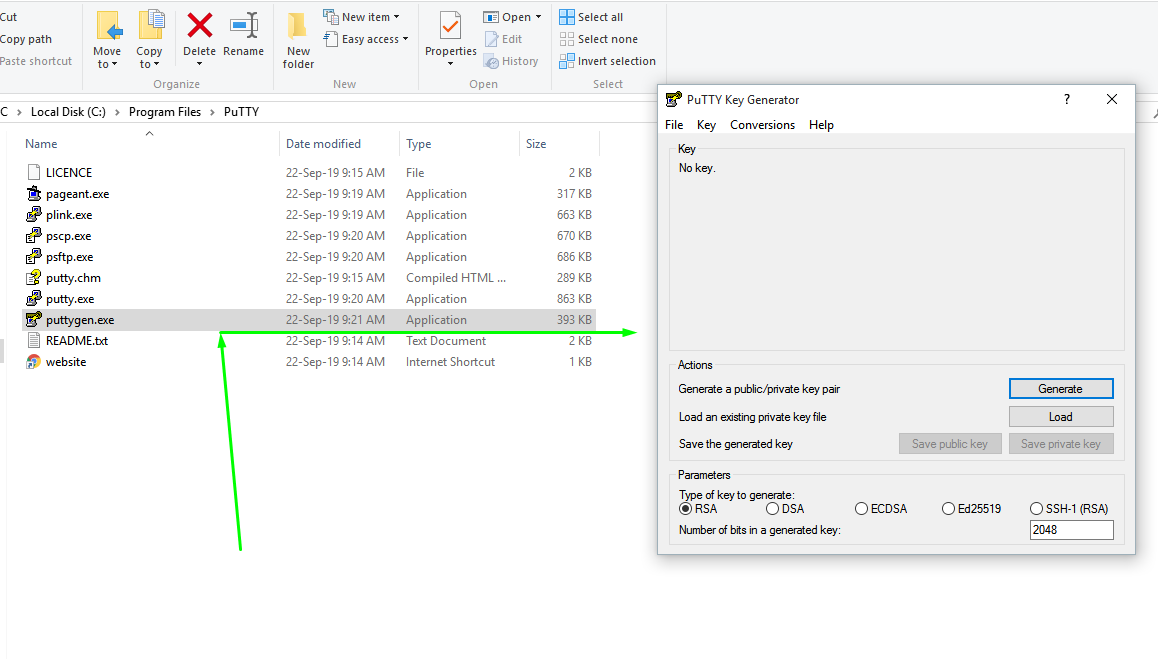
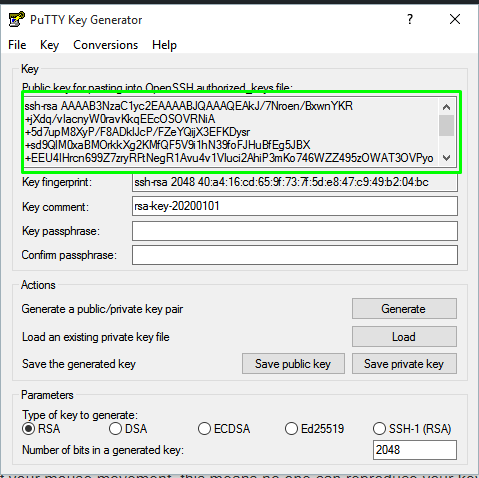
Click Generate and then move your mouse randomly over the blank area. (This is called the entropy of mouse motion. Bring in thousands of users, and no one would ever predict your mouse movement. This means no one can reproduce your keys. If you are curious to learn more, you can read this StackExchange answer .)
Your key looks like this, once it is generated:
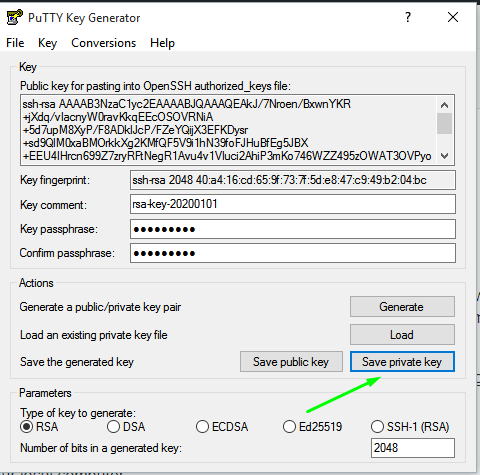
You can also password-protect your SSH key by filling in the Key passphrase field. This way, if someone gains access to your computer, they will need to provide a passphrase to access it. Keep in mind that you must provide this passphrase every time you use this key.
Note: Don’t use a simple password or password you’ve used elsewhere; use something stronger. You can generate one here: 1Password Password Generator
Once generated, store the password inside a private book at home. (No, don’t keep it on your PC.)
Save your Private Keys in a folder in your local computer:
We are getting there!
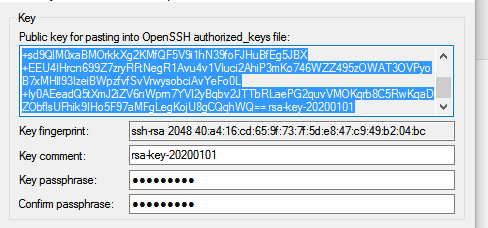
Copy the Public Key and paste it in your DigitalOcean account. Make sure you copy everything:
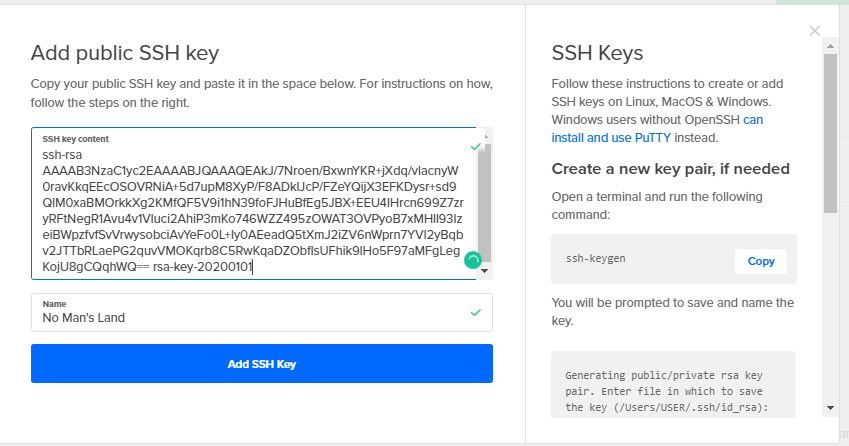
Click “Add SSH Key”
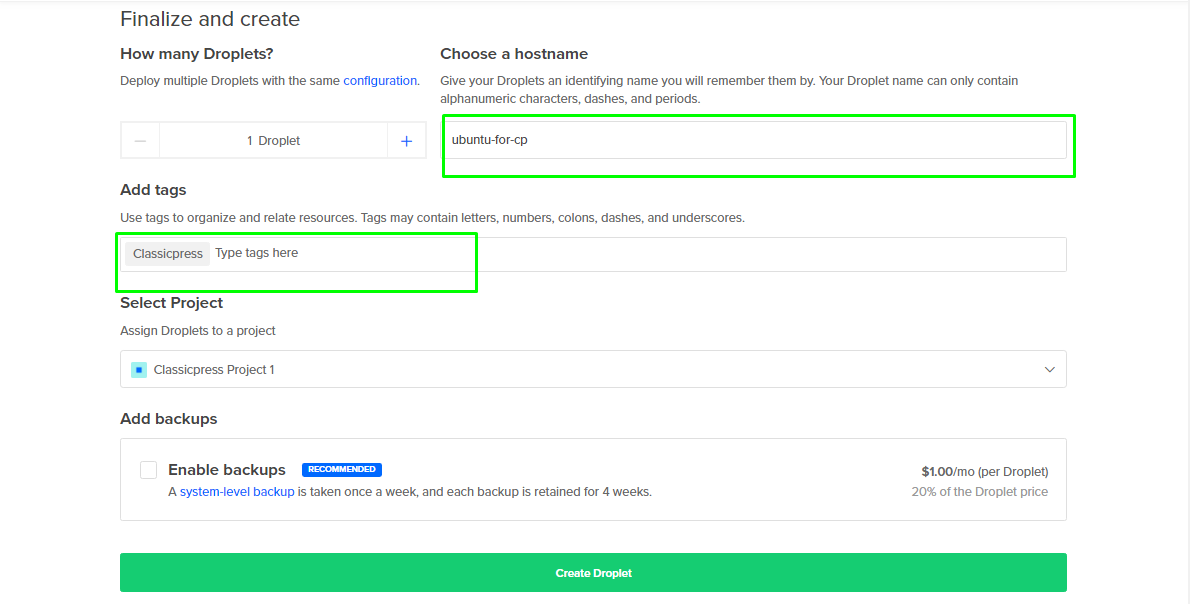
The last step of finalizing our Droplet: Choose your name, add tags and Click “Create Droplet”
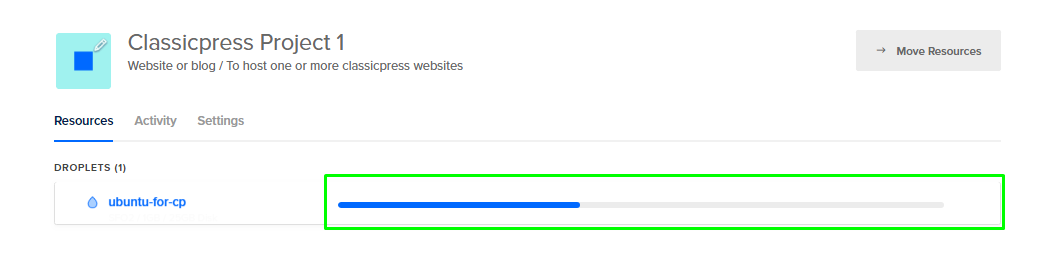
You will see a progress bar:
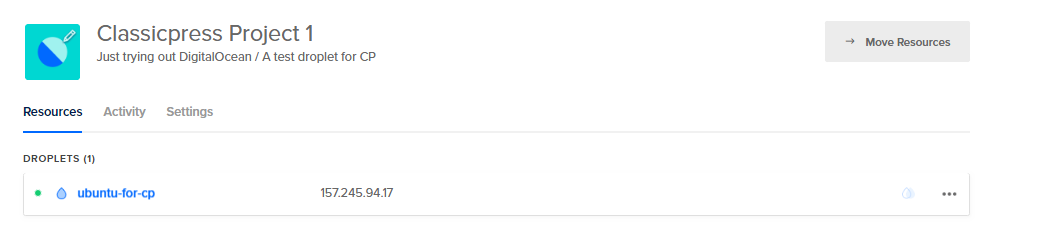
You see this once the progress bar is done setting the server up:
The next part is initial server configuration and a basic server security enhancement that helps in securing your server a bit. When we are done with that, we will point our domain name to our DigitalOcean IP and finally install VestaCP.
Connect to your Droplet with PuTTY on Windows
Since we have PuTTy installed, let’s configure it to connect to our DigitalOcean Droplet
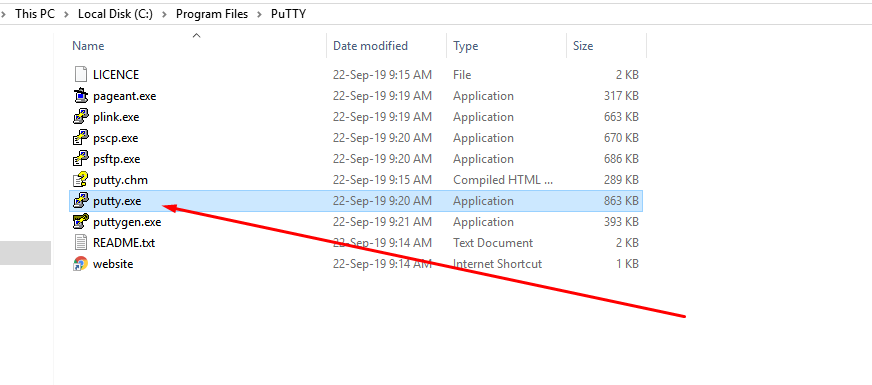
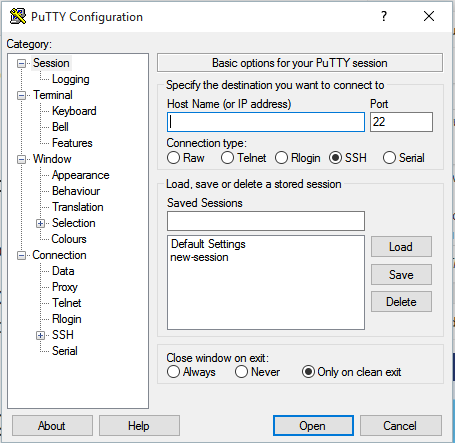
- Open PuTTy: Locate it inside this folder: C:\Program Files\PuTTY and open putty.exe, if you are on a 32-bit system, goto this folder C:\Program Files (x86)\PuTTY and open putty.exe
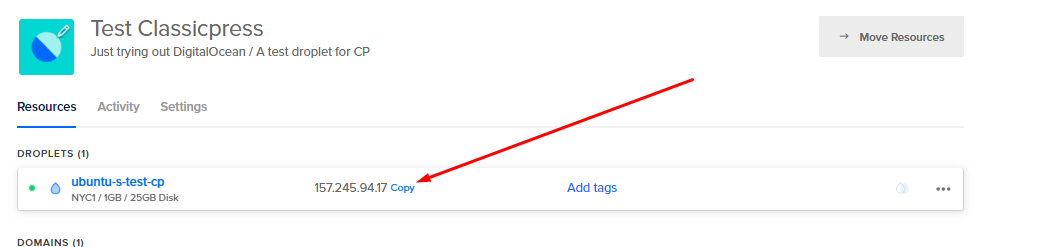
. Putty window ↑ - Copy The Droplets IP: Copy your Droplet IP address in the control panel, and paste it in the putty IP field:
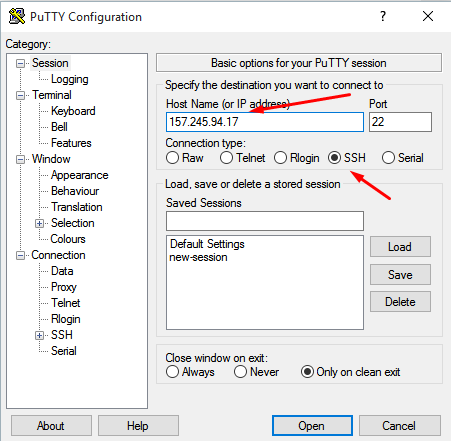
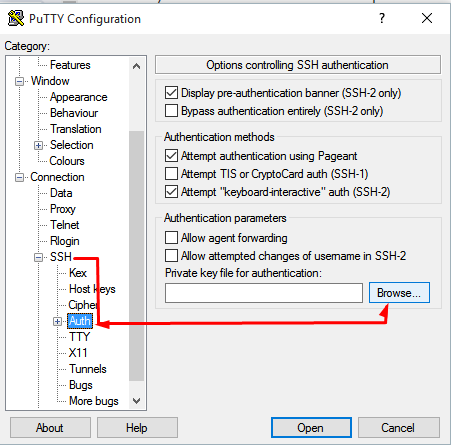
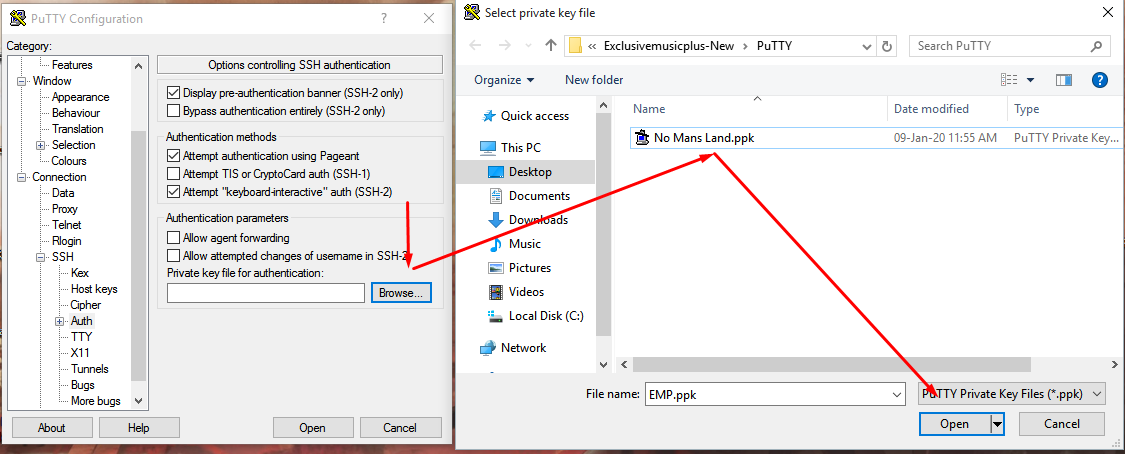
Copy Droplet IP in DigitalOcean control panel ↑ Paste it in the field Hostname ↑ - Add SSH Key: Add the private ssh key we generated in putty
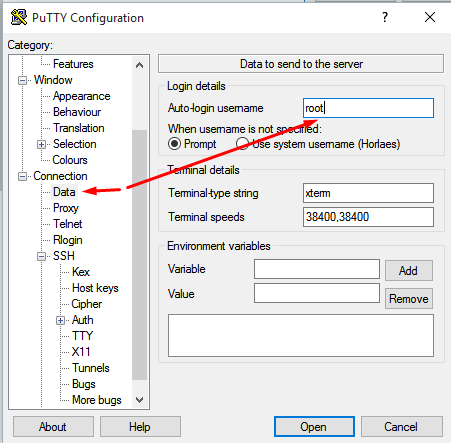
Add ssh authentication ↑ Select the private key we generated from putty the other time ↑ - Add Root User: root is the default administration user on an ubuntu server. Let’s add it to the Auto-login username field:
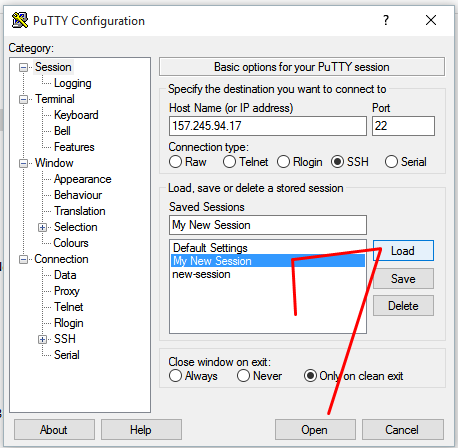
Type in root ↑ - Lastly: Save your session for recurrent login
Type in the session name, in my case, I wrote “My New Session” ↑
- Open PuTTy: Locate it inside this folder: C:\Program Files\PuTTY and open putty.exe, if you are on a 32-bit system, goto this folder C:\Program Files (x86)\PuTTY and open putty.exe

Once you are done with the above steps, you can open up PuTTY and select your new session to access your server.
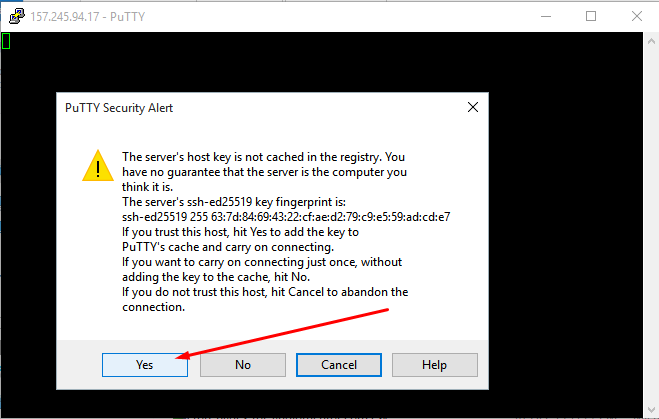
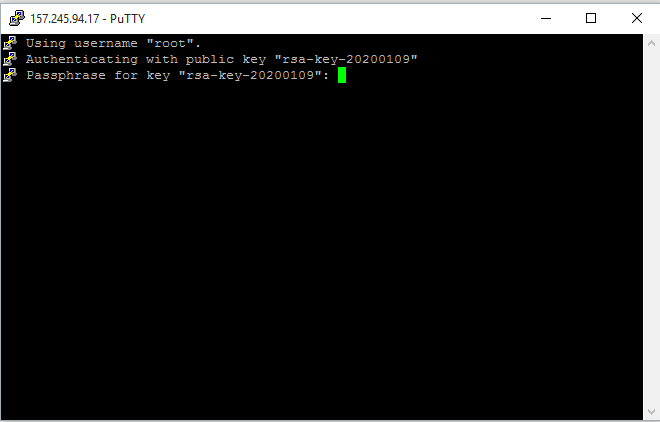
Note: The first time you connect to the Droplet, PuTTY’s security alert pop-up asks you to confirm that you trust the server. Please choose “Yes” to save the server host key as this is the first time you are connecting, or select “No” to connect without saving the identity.
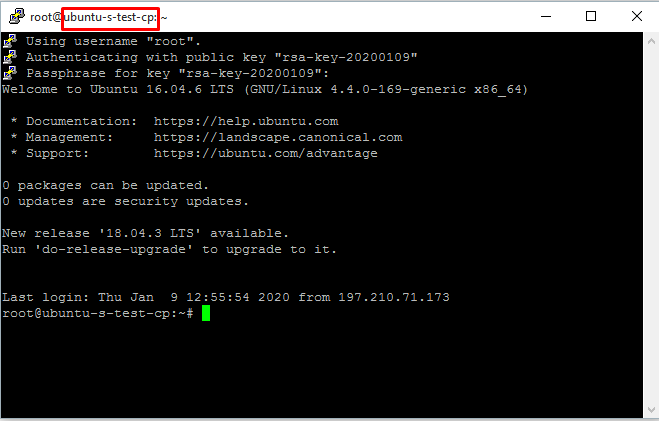
PuTTY automatically adds your root username. Since we are using an SSH key, you will be prompted for the password you set on your key. Input the password and you should be automatically connected to your Droplet server:
Initial Server Setup In Ubuntu (Recommended)
I almost skipped this part!
This section is highly recommended if you care about tightening your server security, usability and reliability.
I won’t cover this in this guide, as I already wrote a detailed tutorial on how to do this: Initial Server Setup on Ubuntu 16.04 [Enhancing Server Security]
If you prefer an automatic method, you can use a setup script from Jason Hee; it does the heavy lifting for you.
In my opinion, you should go with the manual method. You will not only learn how to troubleshoot issues in the future but also see what is going on step by step. Ultimately it is up to you.
Pointing DigitalOcean Nameservers to Your Domain Name
I am using Namecheap, so, the control panel could be different from yours, but it should be similar regardless of the panel.
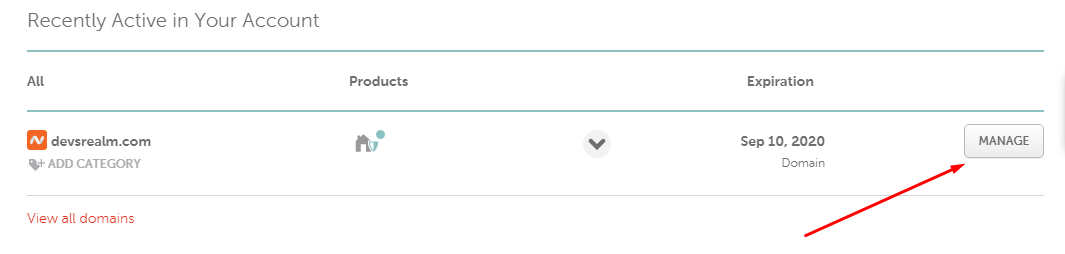
Go into domain manager:
Add Digitalocean nameservers:

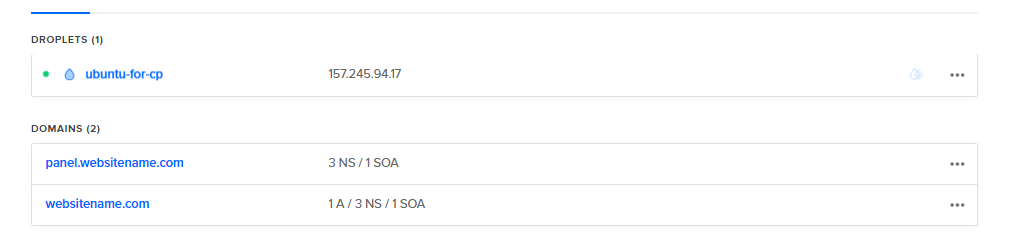
Now, head back to the Digitalocean control panel and create 2 new domain names. One should be your real domain name (e.g websitename.com) and the other should be your panel name (e.g panel1.websitename.com):
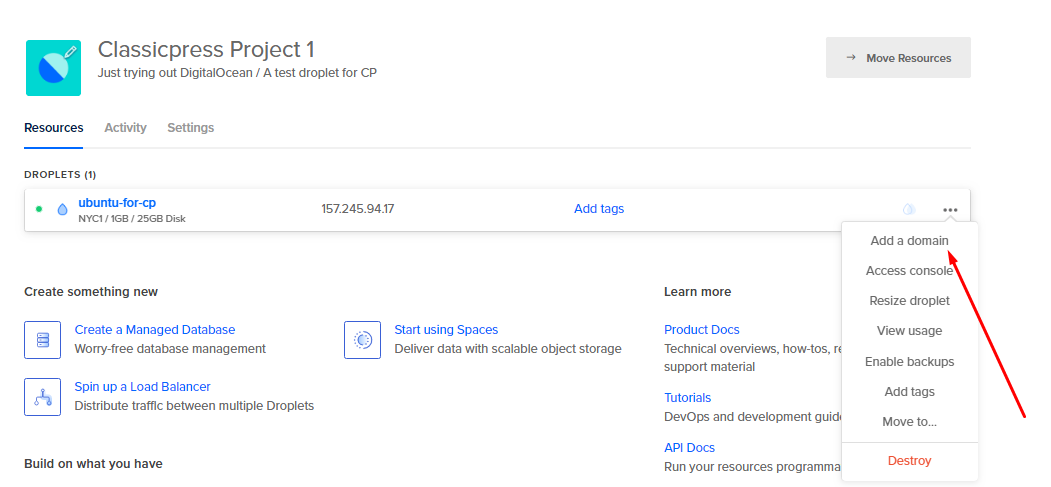

Repeat the above step and create a new domain for your control panel URL: panel1.websitename.com where websitename should be the name of your domain.
If you’ve done that, you should now have this:
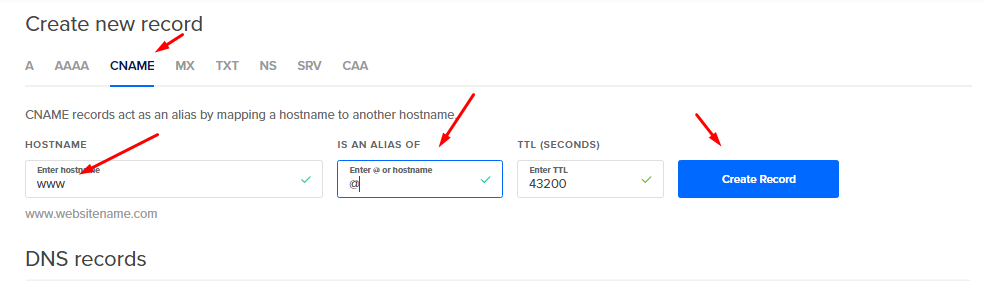
Navigate into the websitename.com, and add a CNAME record pointing www.websitename.com to websitename.com:
If everything is done properly, you should have the below DNS records:
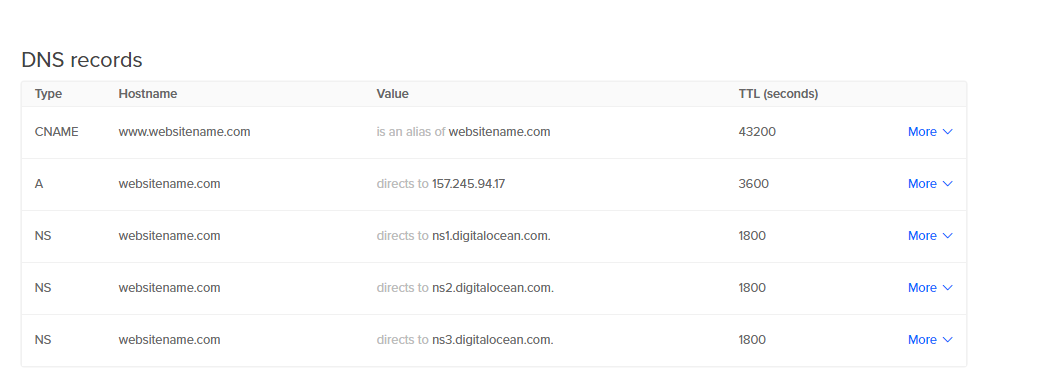
Remember: “websitename.com” should be your domain name, I’ve used this only as an illustration.
Installing Vesta Control Panel
First, log in to your non-root user account. If you don’t have a non-root user, follow this guide Initial Server Setup on Ubuntu 16.04 [Enhancing Server Security]
Download bash install script using the following command:
sudo curl -O http://vestacp.com/pub/vst-install.sh
You might be prompted for a password to confirm you are the new user. Enter the password for the non-root user and proceed by removing group admin using:
sudo groupdel admin
Finally, use this to install vesta:
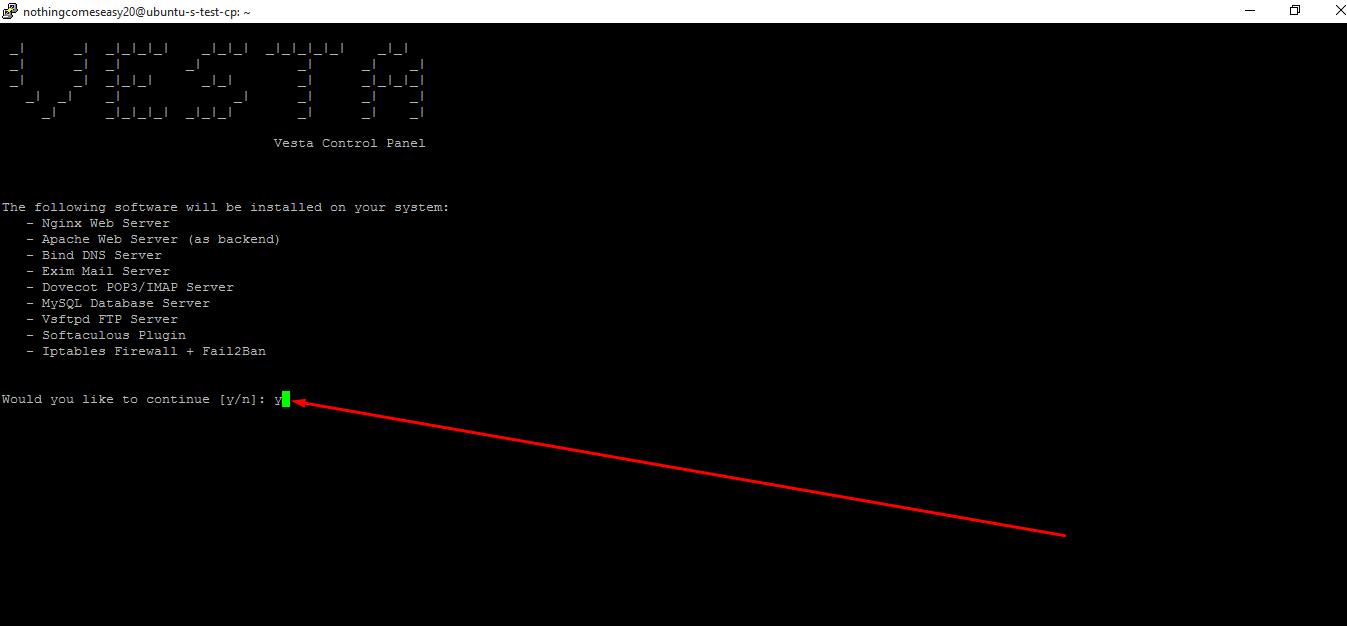
sudo bash vst-install.sh
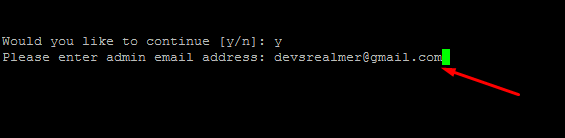
You will be asked to confirm the software you want to install on your system, enter y and hit enter:
You will be asked to enter your email address, please enter one:
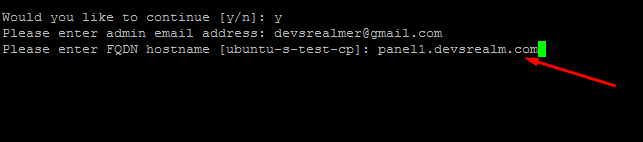
Lastly, you will be asked to enter your FQDN (Fully Qualified Domain Name), this should be the panel URL: mine is panel1.devsrealm.com
Note: Devsrealm is the name of my domain, so you should replace it with yours:
Vestacp takes about 15 minutes to complete the setup, so sit back, take a sip of your water, and watch.
…
Once that is done, Vesta gives us the info to access our control panel:
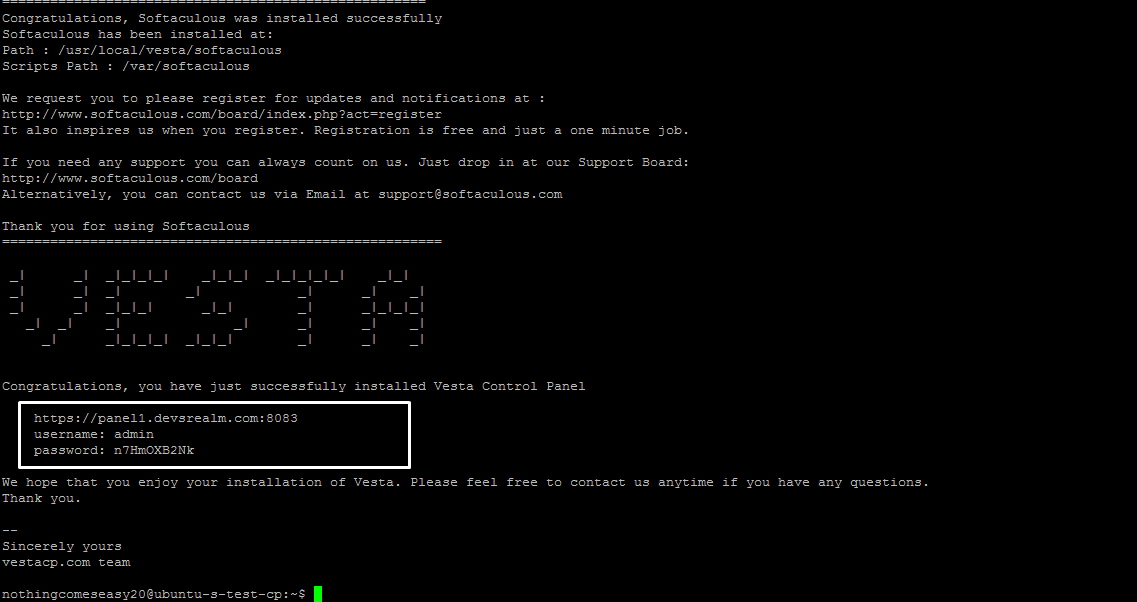
Copy the panel and paste in your preferred browser, this is mine: https://panel1.devsrealm.com:8083
Note: If you aren’t able to access your panel URL, it probably has to do with the DNS propagation. It might take anywhere between 30 minutes – 48 hours. If this happens to you, you can use your Droplet IP to login instead; e.g 157.245.94.17:8083. You can also check the url using whatsmydns.net to see if your url has propagated yet.
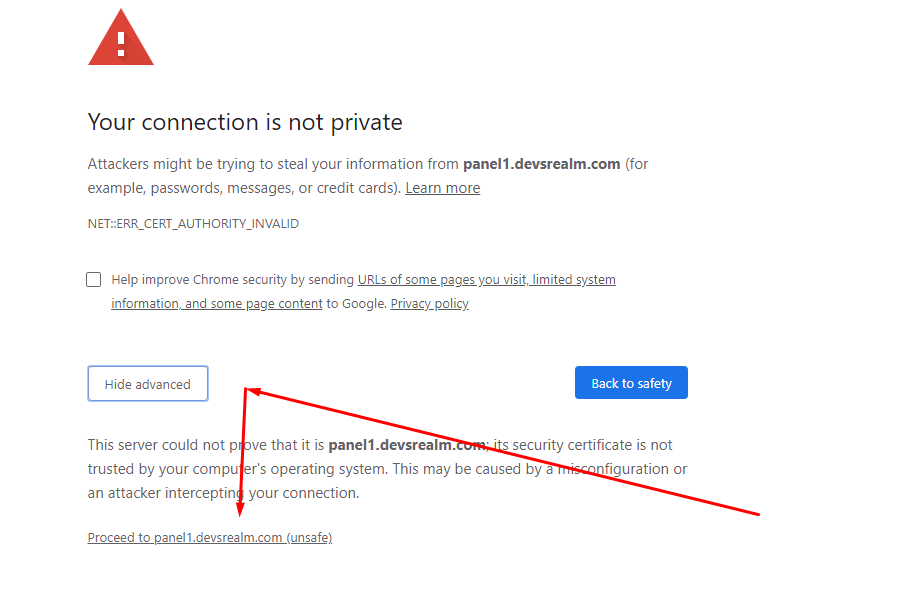
You will get an SSL warning like this, kindly click on advance and proceed. The warning is normal for first-time access:
Setting Up Your Vestacp
 Setting Up Your Vestacp
Log in with the user and password Vesta generated for you:
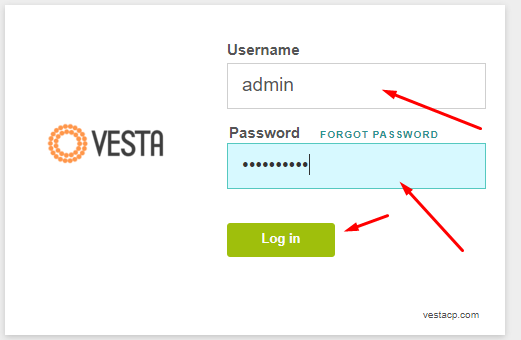
Don’t be like the average Joe! The first thing you should do is change your Vestacp password.
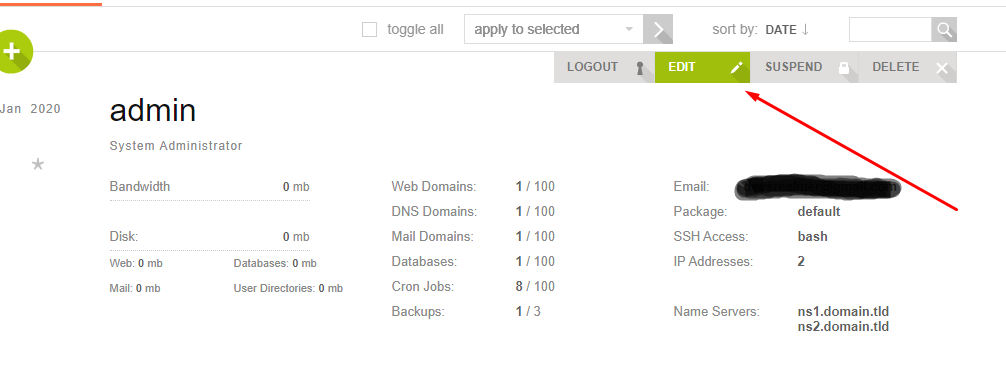
Hover over the admin area, and click Edit:
You can either let Vesta generate the password for you, or you can generate it yourself using Password generator
Wait! Don’t save the settings yet. You can also change other settings like the user’s first and last name, but the most important part to change is the Nameserver:
Change both fields to ns1.digitalocean.com & ns2.digitalocean.com:
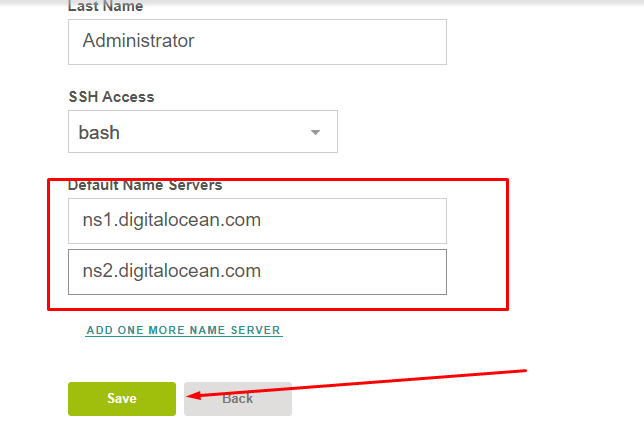
Press Save when you are done fiddling with the settings. Take your time!
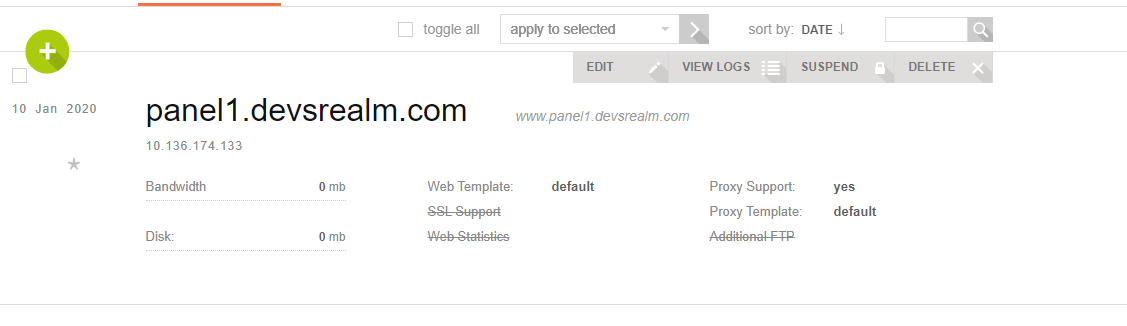
When you are done saving, Navigate to the Web Section:
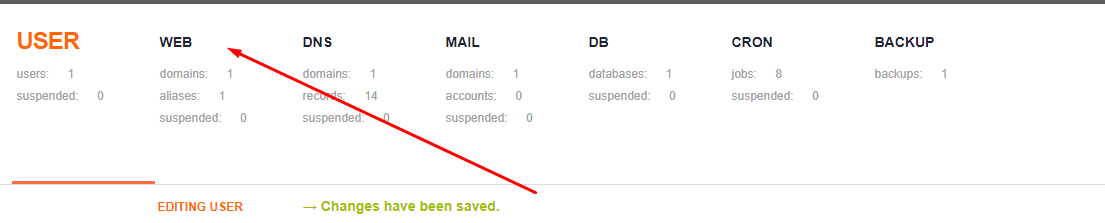
You should see this:
Before we continue editing, visit the URL to confirm all is in place properly. You should see an Apache Ubuntu Default Page, telling you it works!
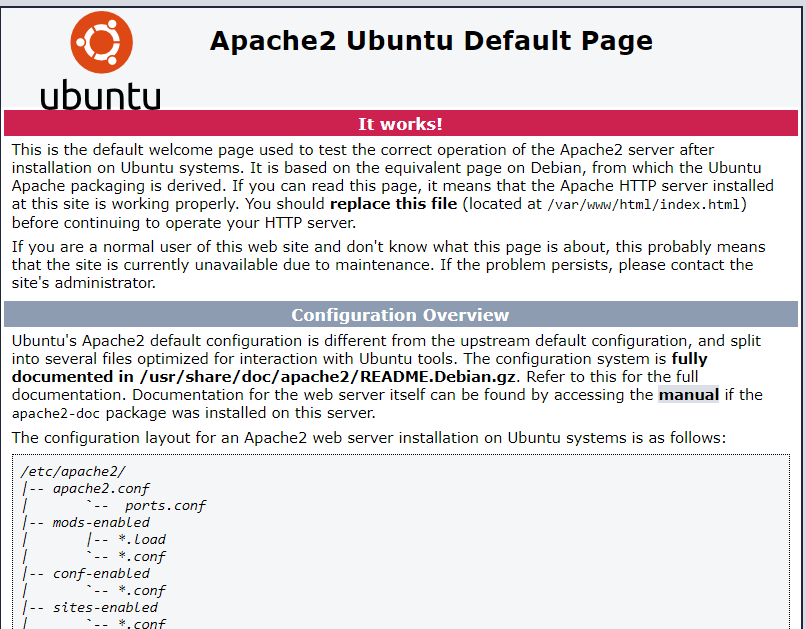
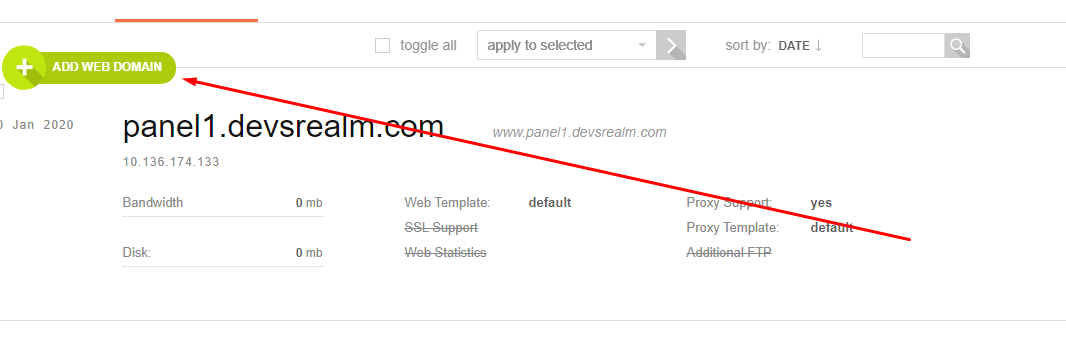
You can read those later, head back to the web section in Vestacp and click on add web domain name.
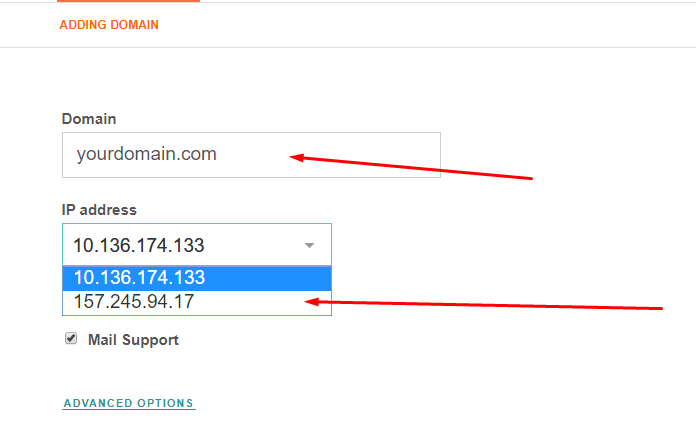
Adding New Domain
Add your domain name and change the IP address to the IP address of your Droplet like so:
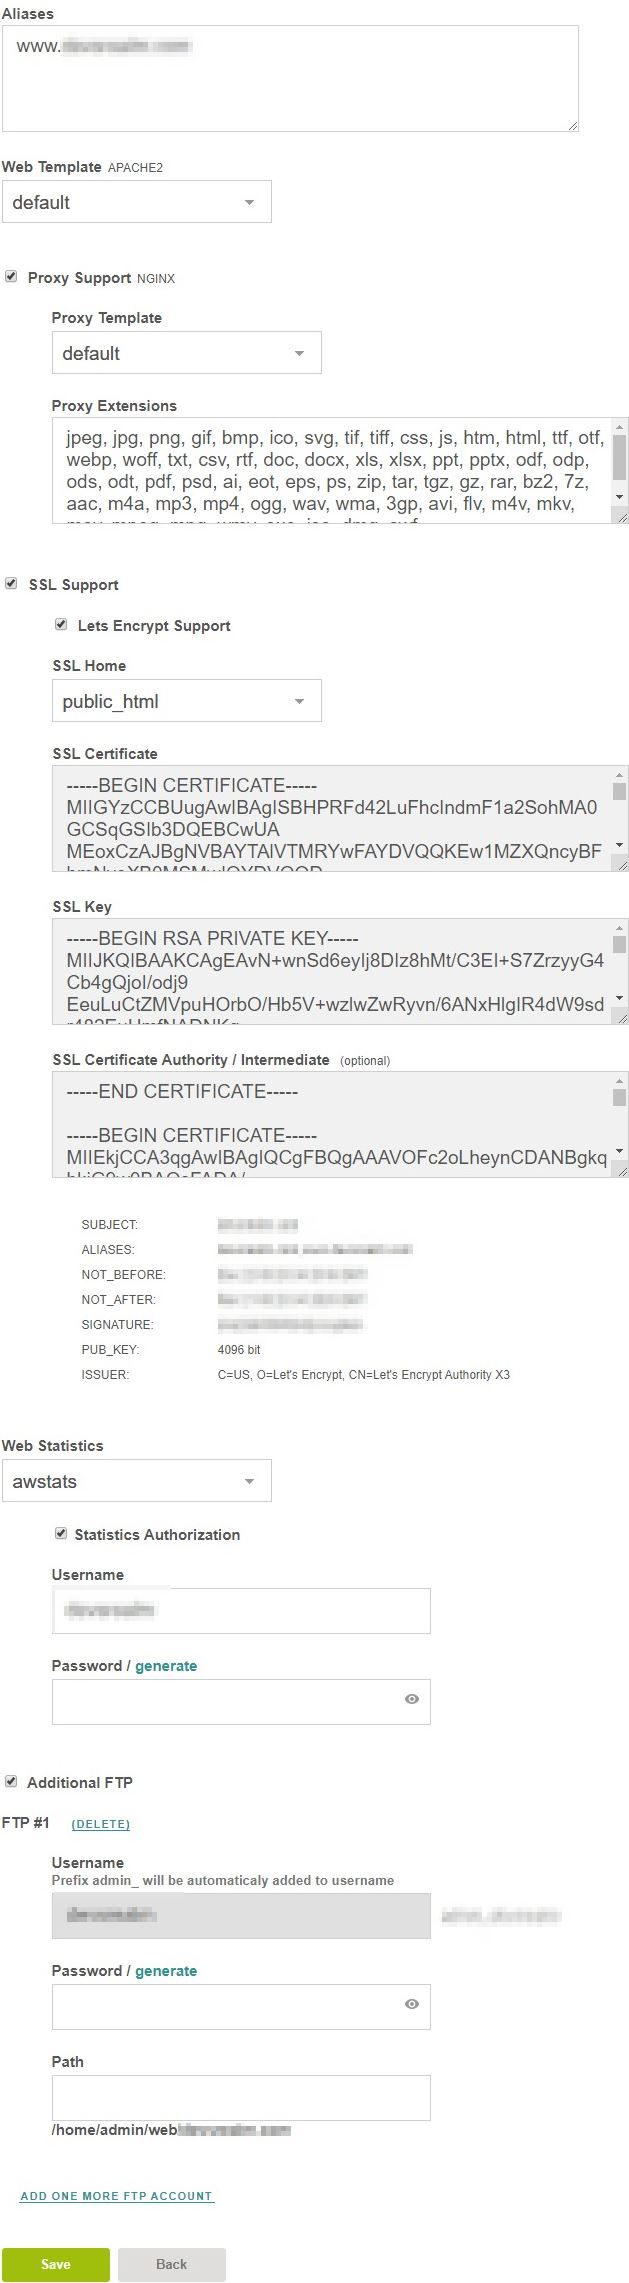
Click Advanced Options, and use the following setting:
- Aliases should be www.yourdomainname.com, this way your user can access your website using www
- Web Template – Default
- Proxy Support – check
- SSL Support – check
- Let’s Encrypt Support – check
- Web statistics – choose Awstats, I love how it shows me the bandwidth I am consuming
- Statistics authorization – check, and add a unique user & pass
- Additional FTP – If you feel you need one for uploading to your hosting easily, check and create the user and password; leave the path as is
- Save.
Access your website URL (e.g yourdomain.com) and you should see something similar:
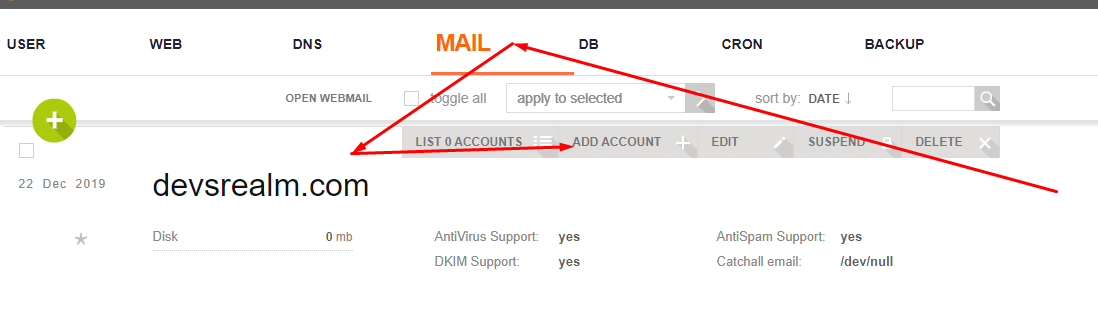
Adding A New Email Account
Go to the mail section and hover over the domain you’ll want to add the email support for:
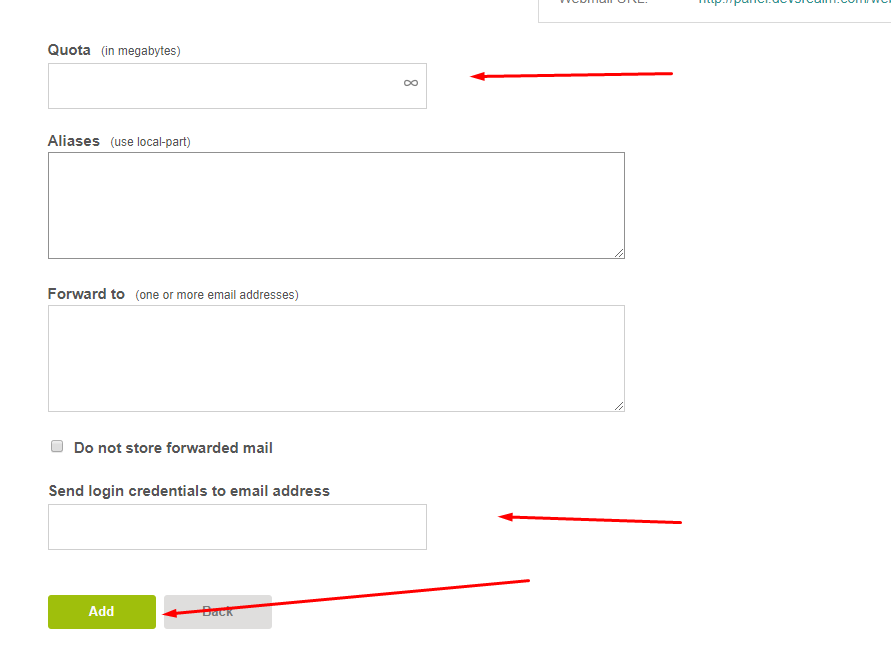
Add your username in the Account field; add a unique password and click on the advanced section
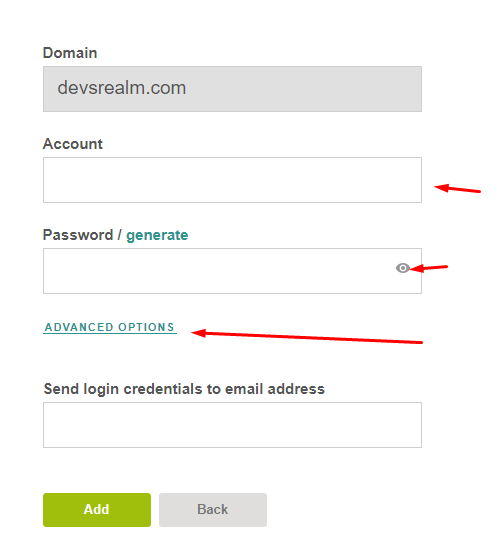
The Quota allows you to set a mailbox size limit. This is useful since you’ll want to reserve disk space for other things. You can press the infinity icon to give it an unlimited storage
Aliases allow you to add other email addresses that forward to that main account. You don’t need this in most cases. The only case you might need is when you have an email account on another service, and you want to keep your emails on that service.
Send login credential to an available email of yours and click Add
To access your email, use panel.example.com/webmail, where example.com should be your domain name. Log in with the user and password you just setup, and you should be ready to go!
Note: You can also use branded nameservers if you have one. It is possible to brand your nameserver if, for instance, you want to use a custom nameserver for every website you are using e.g (ns1.yourwebsite.com). This is beyond the scope of this guide, but if you want to host multiple websites on one Droplet, just point your new domains to the default DigitalOcean nameservers at your domain registrar (ns1.digitalocean.com, ns2.digitalocean.com, and ns3.digitalocean.com) and add new domain as we’ve done above. When adding new domains, make sure you select public address from the listed IP addresses.
Installing ClassicPress Via Softaculous
Softaculous comes pre-installed in Vestacp. It is useful for using scripts to install platforms like ClassicPress, Presta, Joomla, Abantecart, and WordPress. You may also like to refer to this article for further information on Softaculous.
Unfortunately, ClassicPress isn’t available in the free version of Softaculous, but there are workarounds. We can either use a free “Softaculous one-month trial license” to install ClassicPress or use wp-cli to download and install ClassicPress. Installing via wp-cli is a little more complex than we want to get into for this example, so for now, let’s use the free month trial.
Note: You can also buy a VPS license for $12 a year. The price is very reasonable!
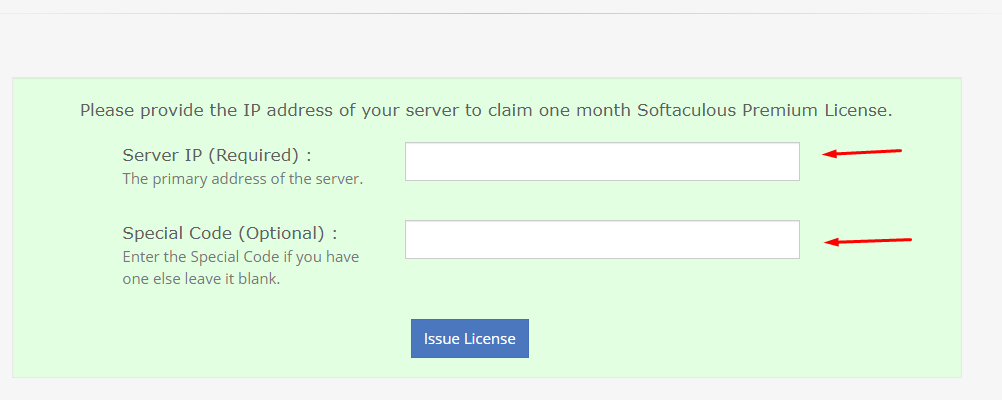
Visit Softaculous Free Premium for your free trial. Enter your Droplet IP and click issue license
Give it about 5 minutes to process, and log in to your panel.
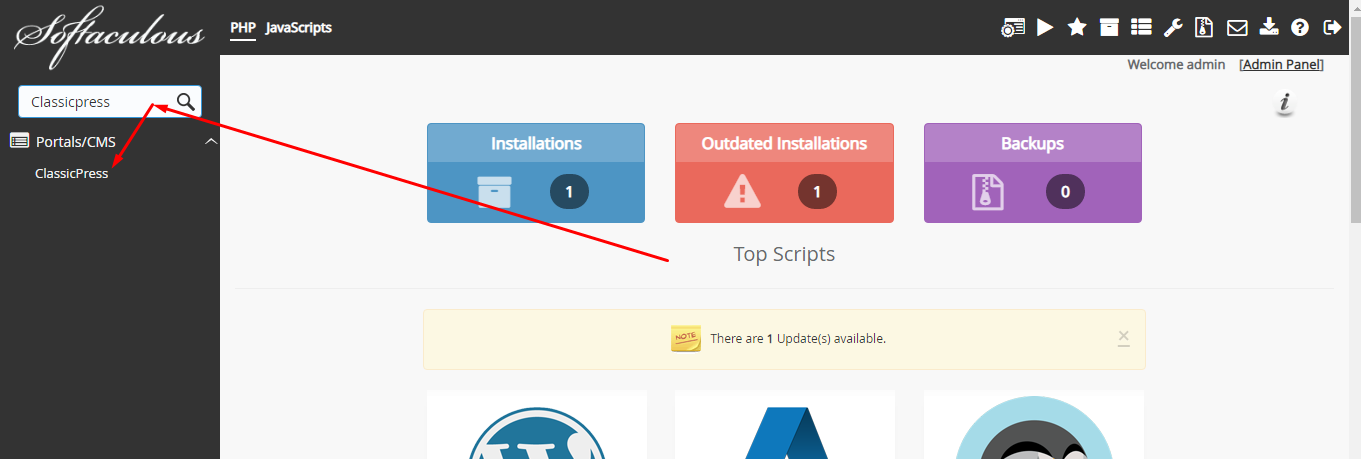
Click on App at the upper section:

Search for ClassicPress:
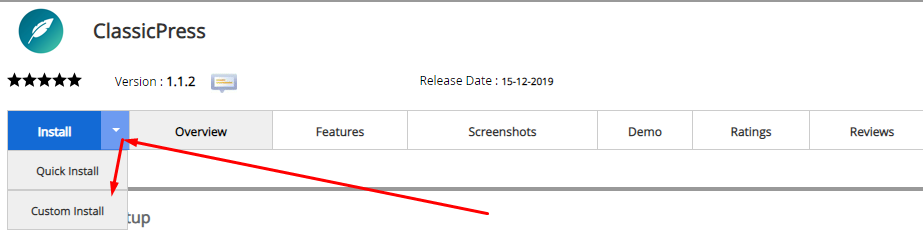
You should see the ClassicPress page. Hover over the Install tab and choose Custom Install:
Use this setting to complete the installation:
- Software Setup – Choose your domain name, and make sure the In Directory is blank
- Site Settings – Add the website name and your preferred description
- Admin Account – You need this to access your admin panel, input user, password and email of the account
- Enter your email in the Email installation details, and Install

When you are done installing, you will be given info details, which should look something like this:
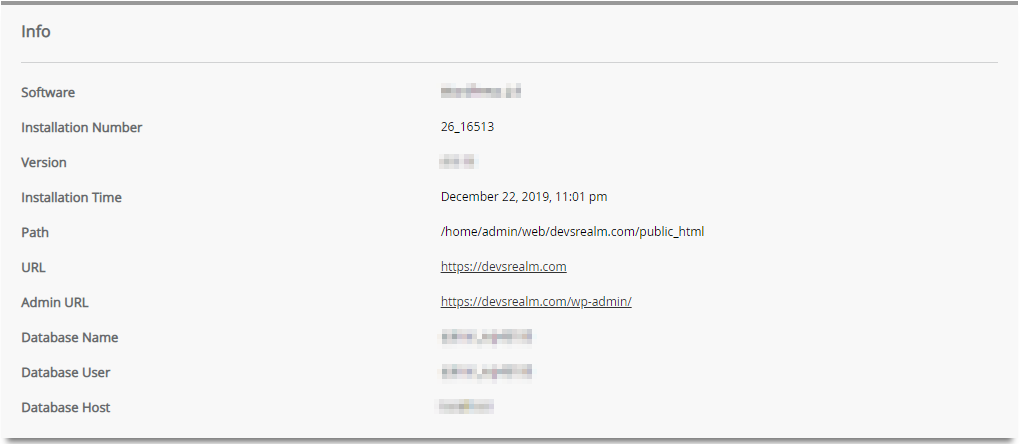
Access the admin dashboard(e.g https://yourwebsite.com/wp-admin) and go rock with ClassicPress.
I hope you enjoy the guide! This is a journal on how I did the setup, so if you are confused or some sections aren’t clear, please don’t hesitate to ask on the Forums. You can also message me privately on the ClassicPress Slack workspace @Horlaes. I would be happy to help you out if I can.
Credit: Thanks to Wade Striebel & William Patton for pointing out errors and demystifying complex terminologies.
Props to the hard-working people at ClassicPress, Wade, James, Tim Hughes & Tim Kaye, Klein, Lan, John, Alan, Earle, Elisabetta, Fabian, Michelle and others I didn’t mention.
This article has been provided by Ahmed Faruq and was originally published on DevsRealm.com. The original post can be found here.