GitHub Tutorial – Step 8 – Fetch and Merge
Fetch and Merge
This article is part of a series on Github Desktop. For the introductory piece you can visit here.
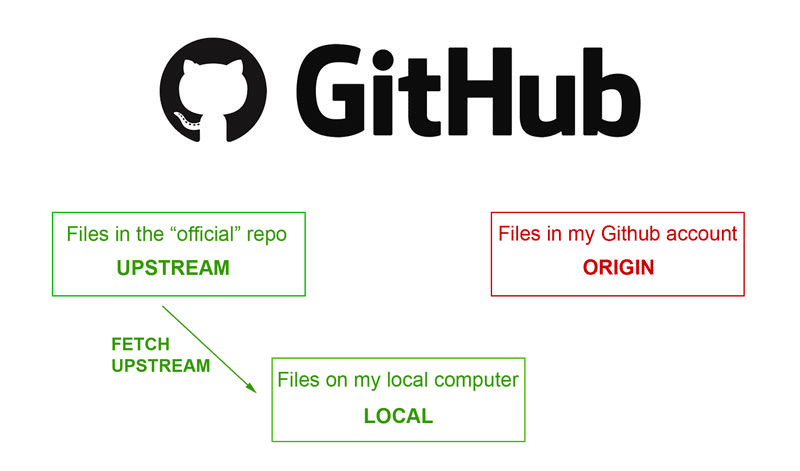
You now need to update the files in your local computer to reflect the new “official” repo files. You do this by fetching the upstream files to local and merging them in with the files there (it’s a good idea to do this regularly, to keep up with all the changes). You can also delete the branch as this is no longer required.
The first step is to switch GitHub Desktop’s current branch to the default branch in the upstream repo. Note that (for some obscure reason) this is not shown as “upstream/develop”, but is just called “develop”.
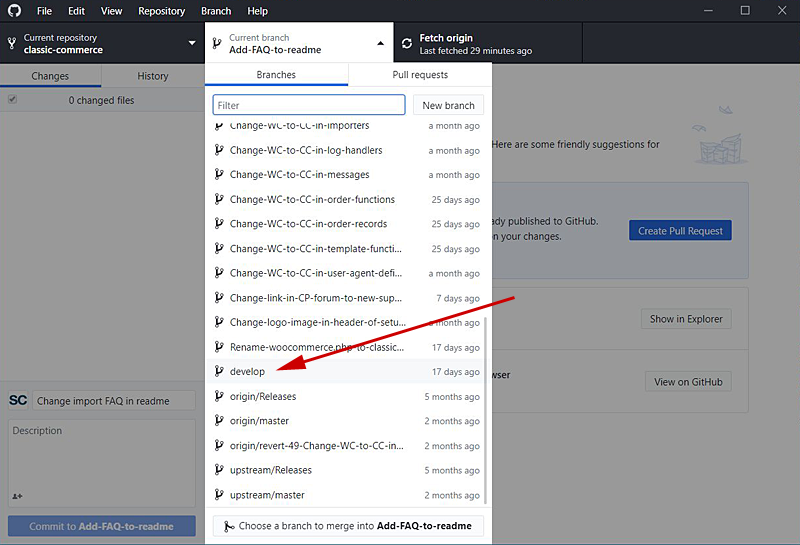
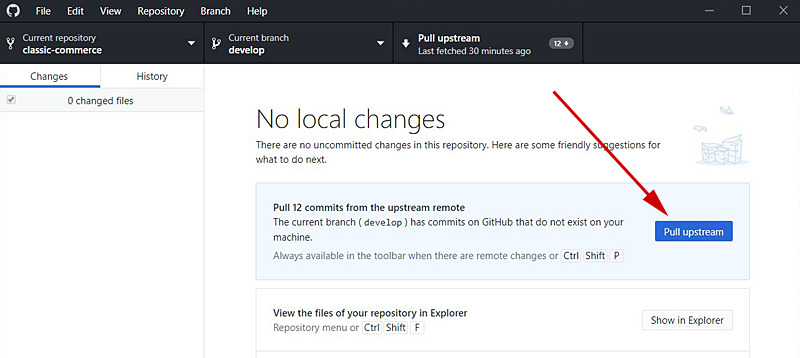
Select this from the list to make it the current branch; it should show that there are commits that need to be pulled from upstream. Click the button to do this.
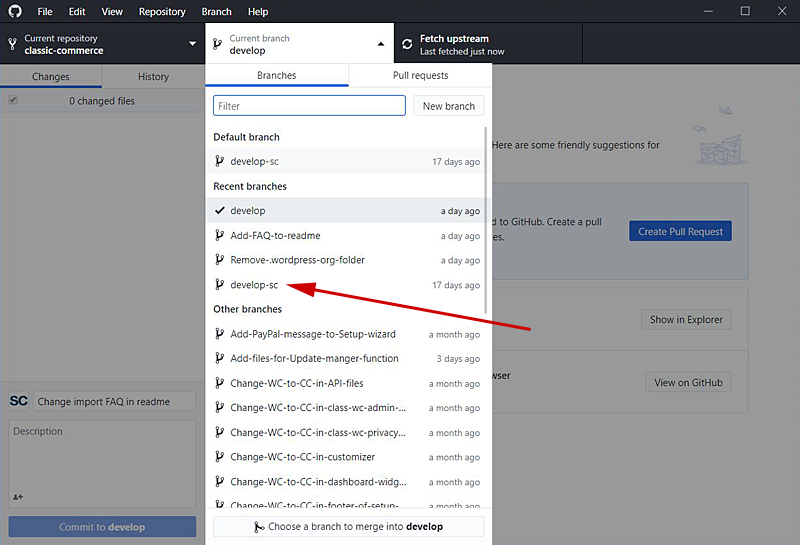
Note that this process only updates your local version of the “official” default repo. You will still need to merge this into your default repo. So change the active branch back to your own default branch by selecting it from the dropdown list…
…then click on the Branch option in the top menu and choose Merge into current branch.
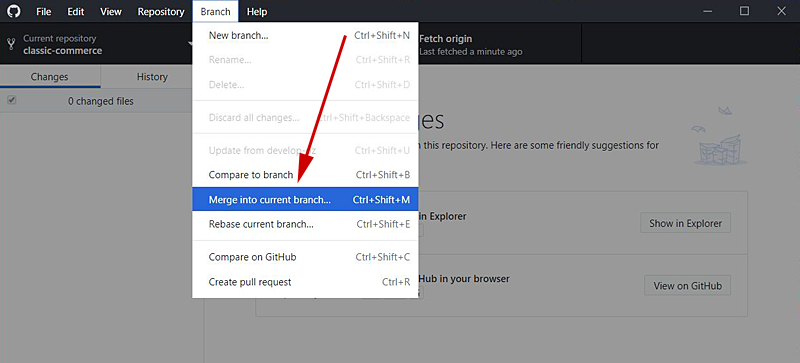
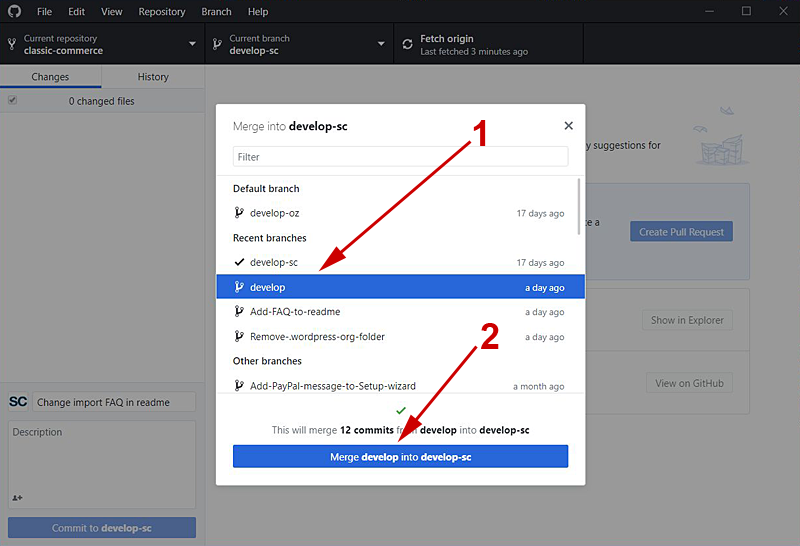
- You need to select the default upstream repo to merge into your default local repo… in this case we are merging develop into develop-sc.
- Check the text in the merge button is correct and then click to merge.
Now local is back in sync with upstream. The only player still behind the game is origin.