Github Desktop – Step 1 – Fork
How to fork a repository
This article is part of a series on Github Desktop. For the introductory piece you can visit here.
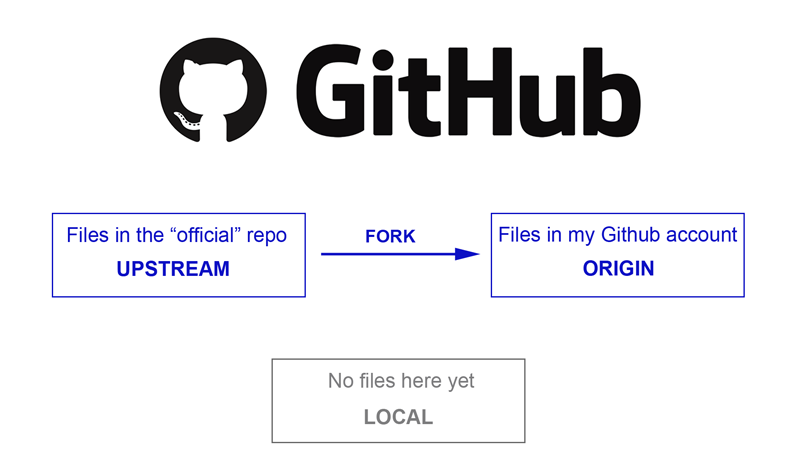
You obviously can’t work directly on the main project files, so you first need to take a copy of them to your own GitHub account. This is called a fork and it involves copying the files from the “official” repo (upstream) to your own account (origin).
You will need your own GitHub account before you can begin. Once that is set up and you are logged into your account, find the repo on GitHub that you want to fork. For this example we will be forking Classic Commerce, so we go to the main Classic Commerce repo.
- Make sure it still shows you as logged in to your account.
- Then click the “Fork” icon in the top right.
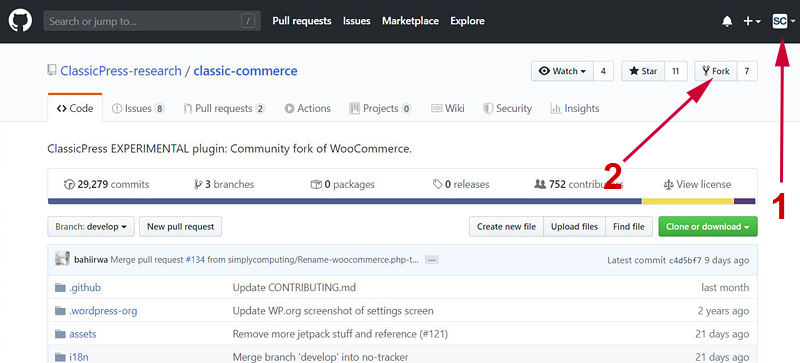
That’s it! It will now complete the process for you.
IMPORTANT:
GitHub Desktop has a quirky limitation that has been discussed numerous times online but remains unfixed. Creating a fork automatically makes a default branch in your fork with the same name as the default branch in the upstream repo. GitHub Desktop needs these two to have different names.
The solution is to create a new branch with another name in your fork, make it the default and then delete the branch that was created originally. The default branch is often called master, but in our case it is develop. You will need to follow the procedure outlined below.
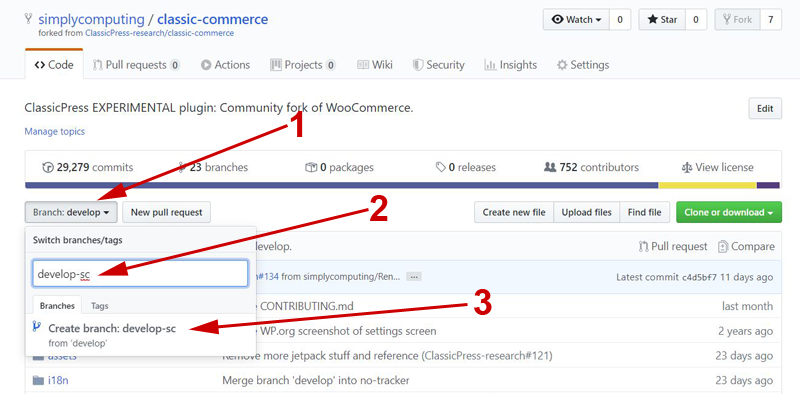
- Click on the Branch button to get the dropdown box of current branches.
- Enter the name of a new branch – just use a minor variation of the current default branch.
- Click on Create branch.
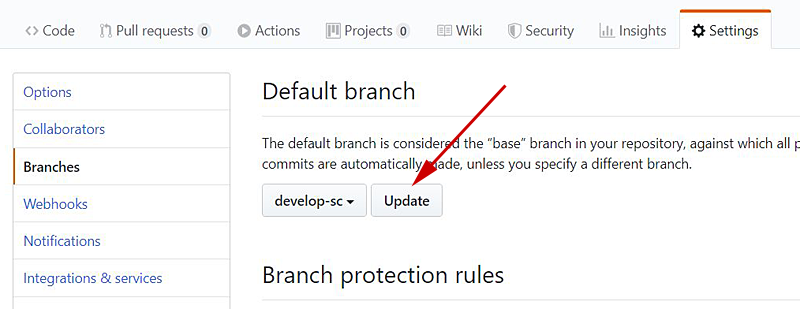
- Now, click on Settings.
- Select Branches in the side menu.
- Choose the branch name you just made.
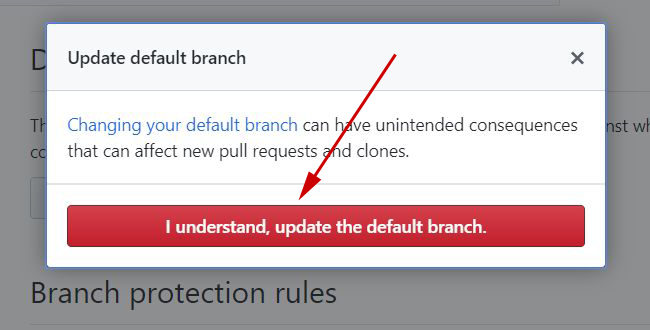
Click the Update button to set this as the default branch.
You will get a warning message – click the button to continue.
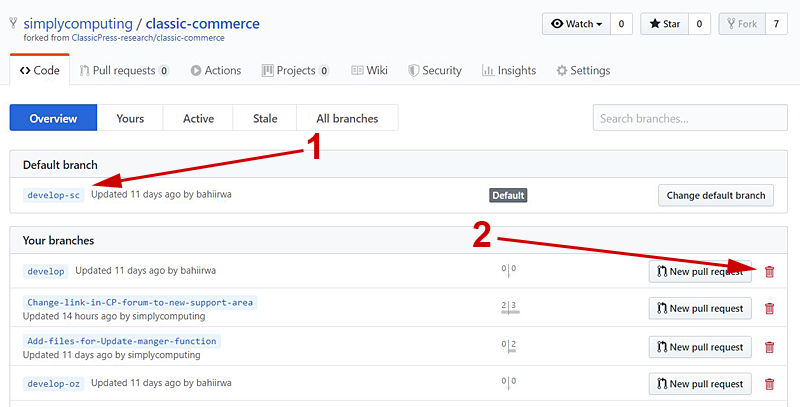
On the main screen, click the Branches section in the top menu to see all the current branches.
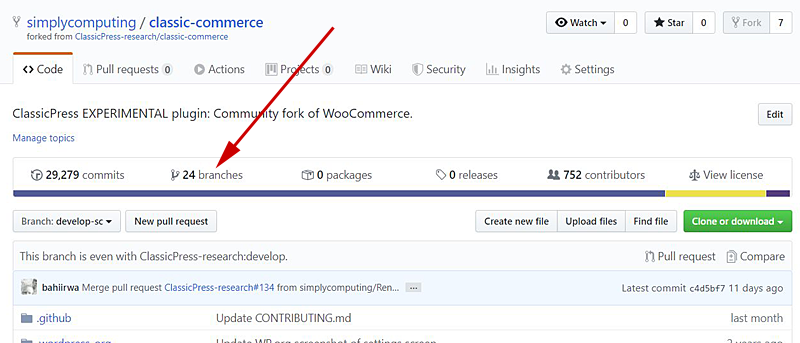
- Check that you have the new default branch with your unique name.
- Then delete the branch that was originally created.
Now you are ready to start working in GitHub Desktop.
This article has been provided by Alan Coggins and was originally published on SimplyComputing.com.au. The original post can be found here.