Github Desktop – Step 2 – Clone
Cloning a Repository
This article is part of a series on Github Desktop. For the introductory piece you can visit here.
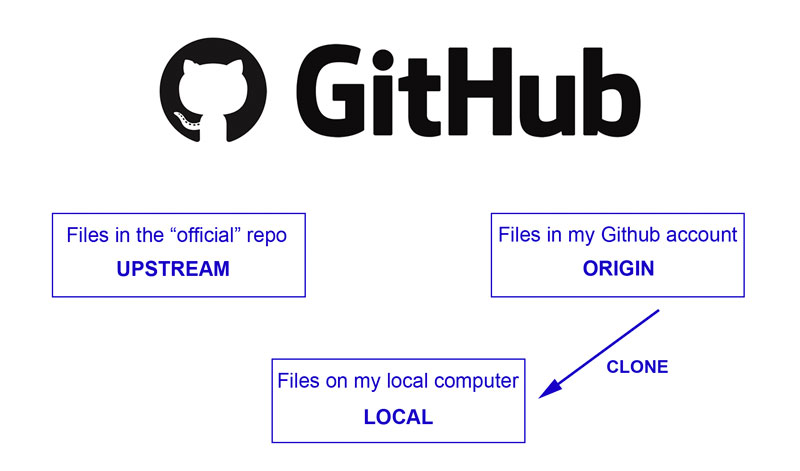
In order to work on the files easily, you will need to make another copy on your local machine. You can do this through GitHub Desktop by cloning the files from origin (the fork of the “official” files you created in your GitHub account).
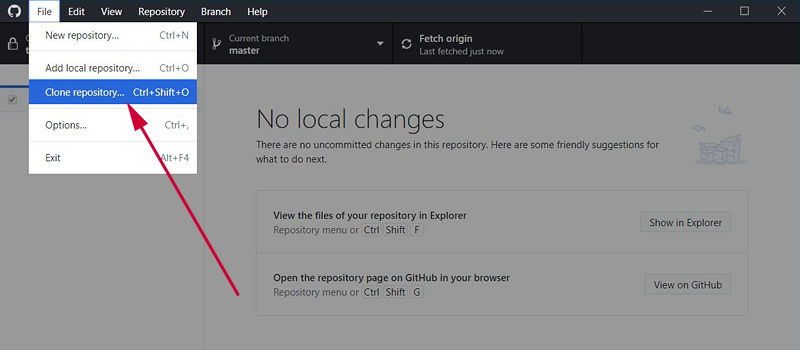
You will first need to download and install GitHub Desktop – then open it and select the Clone repository option from the File menu.
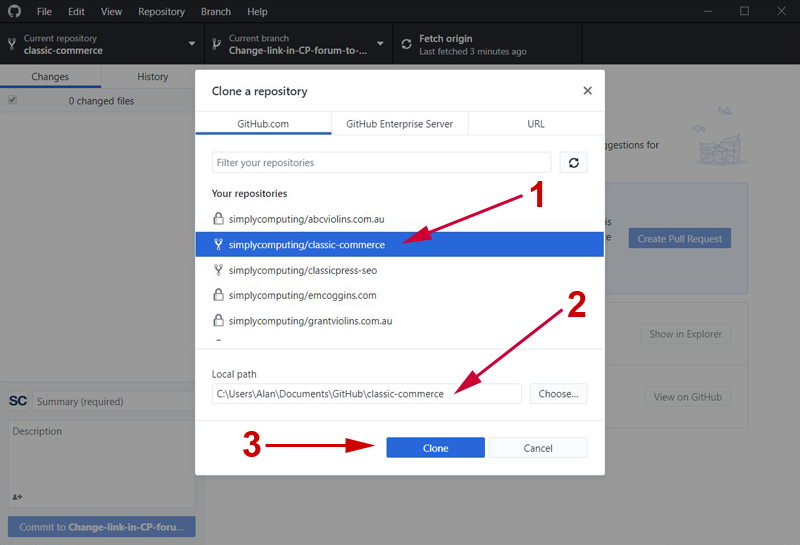
You will be asked to choose a repository from Github.com
- Find the repository you have just forked (it should have the fork icon next to it) and select it.
- Check the path that is auto-filled is correct.
- Hit Clone.
The cloning process will begin:

This article has been provided by Alan Coggins and was originally published on SimplyComputing.com.au. The original post can be found here.